Finance Entry Setup
This section covers
- What You Need to Prepare Before Using Finance Entry
- How to Create a Finance Entry (Portal)
- How to Delete a Submitted Finance Entry
🔐 Access Requirements
- You need a Finance module subscription to access Finance Entry.
- Finance setup can ONLY be performed by:
- TreeAMS Site Admin, or
- TreeAMS Site User with the sub-role TAMS Finance Manager.
- Finance Entry is ONLY available to Desktop and Tablet view
What You Need to Prepare Before Using Finance Entry
Before you can start using the Finance Entry module, make sure the following setup is completed.
1️⃣ Account Type Setup
Before you can use Finance Entry, you must first create an Account List.
Account List define the structure of your financial data in Finance Entry. They determine how income and expenses are categorized, calculated, and reported.
Steps to Create an Account List:
- Go to Desk. Learn how you can switch to Desk here!
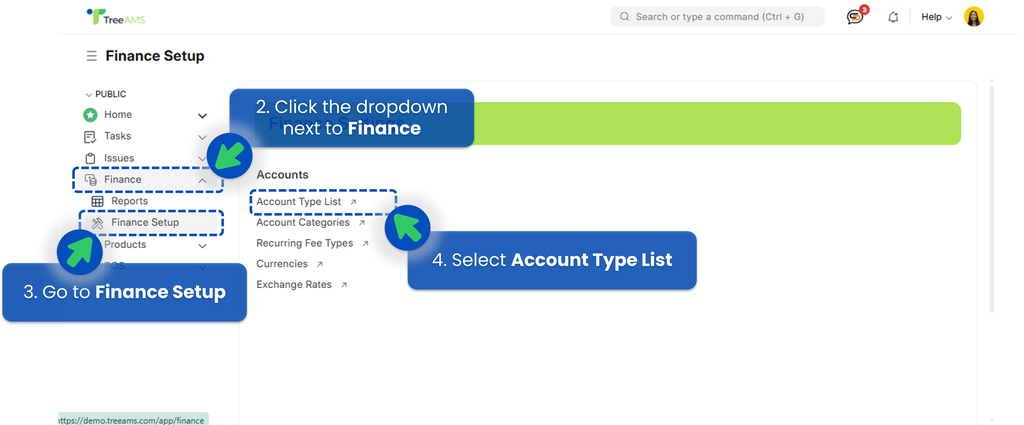
- Click the drop down next to Finance menu.
- Click Finance Setup.
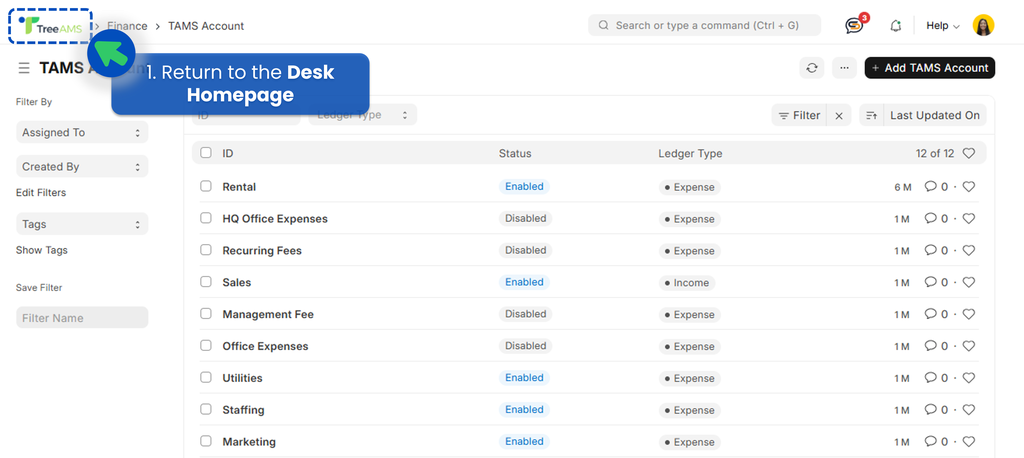
- Select Account Type List.
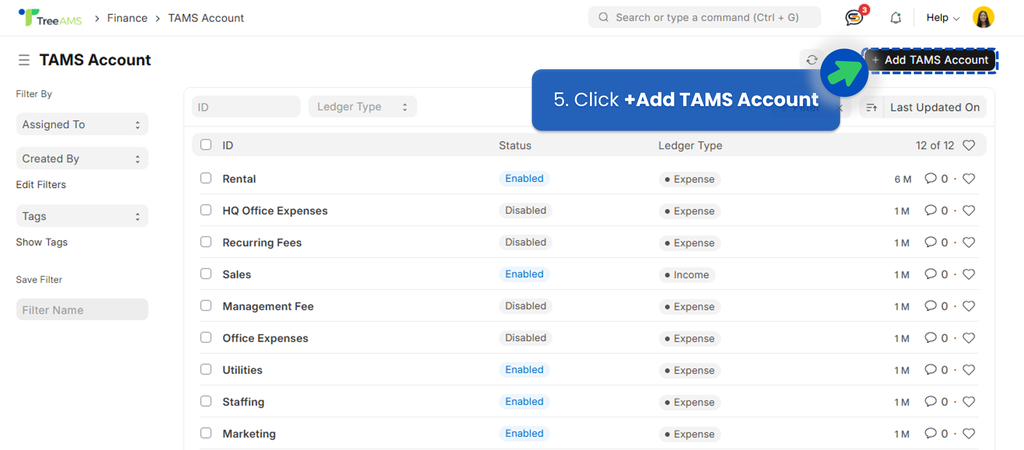
- Click +Add TAMS Account to create a new account.
- A popup window will appear. Fill in the following fields:
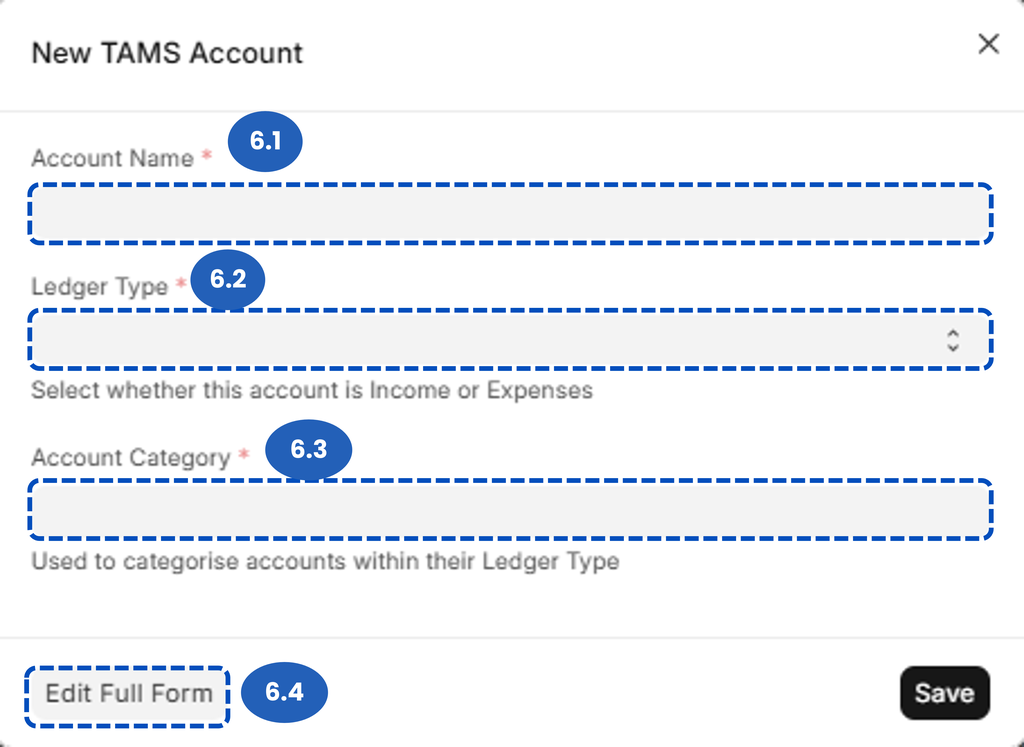
- Account Name (Required) 👉 Enter the name of the account (e.g., Sales Revenue, Utilities Expense, Staff Salary).
- Ledger Type (Required) 👉 Select whether the account is classified as:
- Income — for revenue-related accounts
- Expenses — for cost-related accounts
- Account Category (Required) 👉 Choose a category to group similar accounts under the same ledger type. This helps organize financial data and improves analytics clarity.
- When you click Edit Full Form, you can view and manage detailed settings for the selected account:
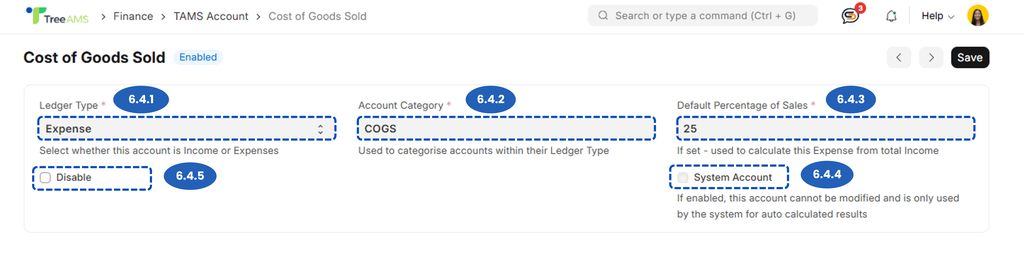
- Ledger Type 👉 classified as Income or Expenses.
- Account Category 👉 Group the account (e.g., Revenue, Operational Cost).
- Default Percentage of Sales 👉 Enter a percentage value (e.g., 25%) to automatically calculates this expense based on total Income.
- System Account 👉 If enabled, this account is used by the system for auto-calculated values, for instance if your company use POS System.
- Disable Checkbox 👉 Hides the account from Finance Entry.
- Click Save to create the account type.
2️⃣ Set Default Account for Each Unit (Mandatory)
Each Unit MUST HAVE a default account set before Finance Entry can be used.
Steps:
- Go back to the Desk Homepage by clicking the TreeAMS icon.
- Click the dropdown next to the Home menu.
- Select Organisation.
- Click Network Structure.

- Hover over the HQ node and click Edit.

- Open the Financials tab.
- Under the Accounts section, click “Set from defaults”.
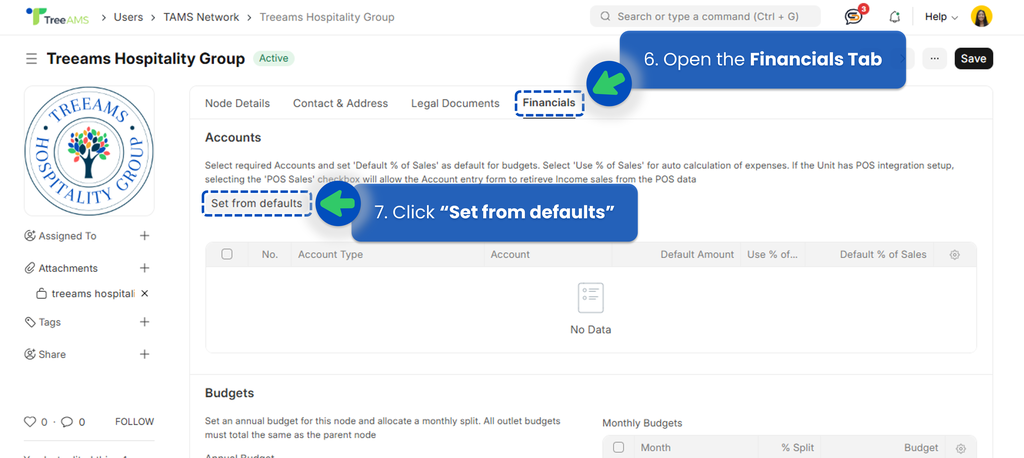
The system will apply all predefined Account List to the selected node (HQ, Branch, or Unit). - After the Account List appears, choose how each account will be filled in Finance Entry:
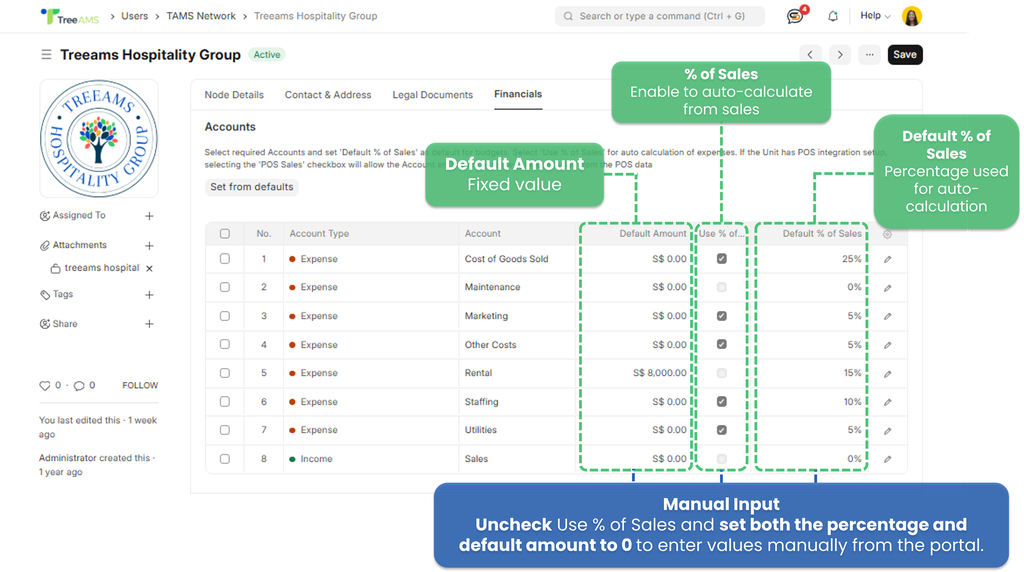
- Use % of Sales — Automatically calculate the amount based on sales.
- Default Amount — Apply a fixed amount automatically.
- Manual Input — Uncheck Use % of Sales and set both the percentage and default amount to 0 to enter values manually each time.
- Click Save to apply changes.
3️⃣ Set Up Budgets (Optional)
Budget setup is optional, but highly recommended if you plan to use the Finance Dashboard.
This section allows you to define an annual budget for a node and allocate it into monthly budgets. The system will automatically calculate monthly values based on the percentage split you define.
Setting up budgets helps you:
- Compare actual performance vs budget
- Monitor spending trends over time
- Gain clearer insights in Finance Dashboard reports
How to Set the Budget:
- Enter the Annual Budget for the selected node.
- Click Add Month Rows — the system will automatically distribute the annual budget across 12 months.
- Adjust the % Split based on your planned monthly budget allocation.
- The total percentage across 12 months must equal 100%.
- You can edit current or past months, but changes will ONLY apply to future months.
⚠️ Note: Unit node account can only use the parent legal entity accounts.
How to Create a Finance Entry (Portal)
Once the Finance setup is complete, Finance Entry is ready to use in the Portal.
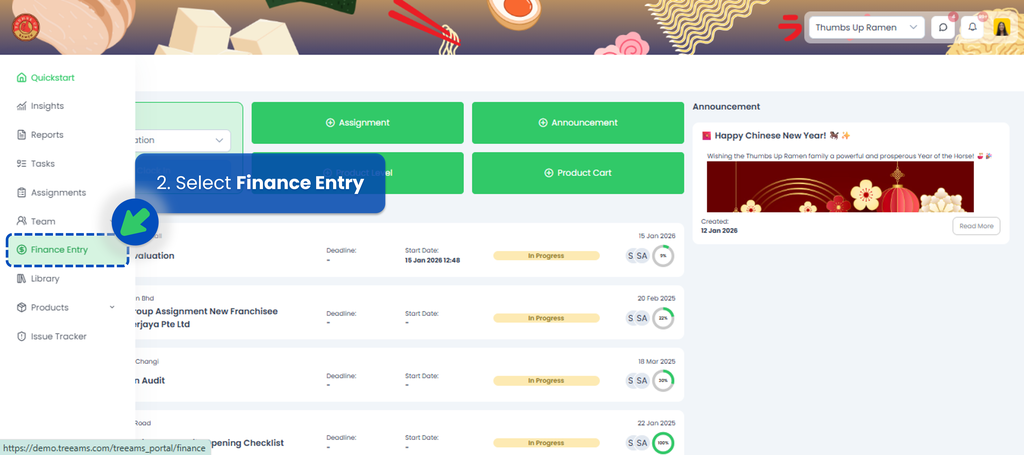
- Go to the Portal. Learn how you can switch to Portal here!
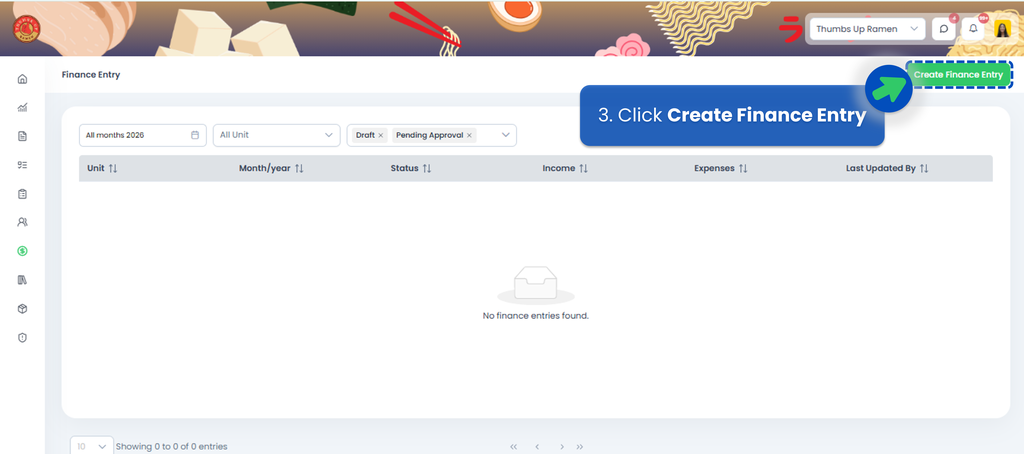
- From the sidebar menu, select Finance Entry.
- Click "Create Finance Entry".
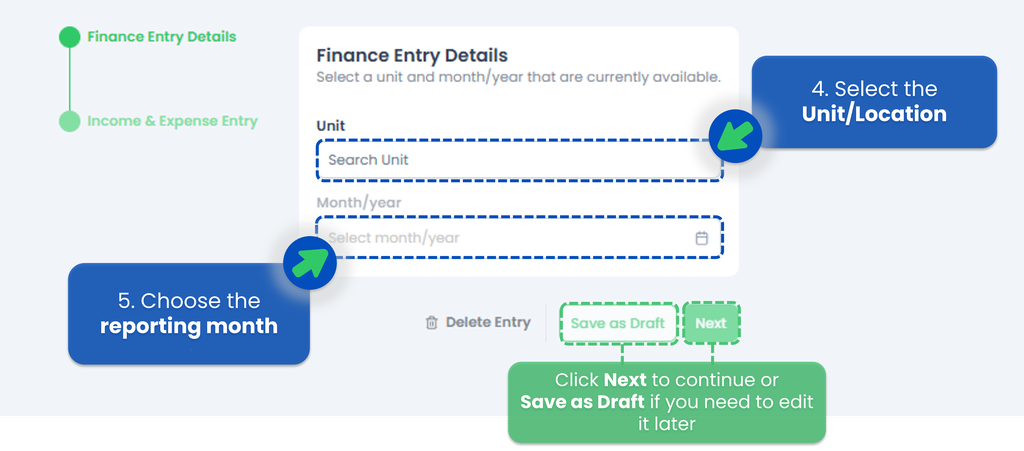
- Select the Unit/Location you want to create the Finance Entry for.
- Choose the reporting month, then click Next.
- Enter the Sales for the selected month.
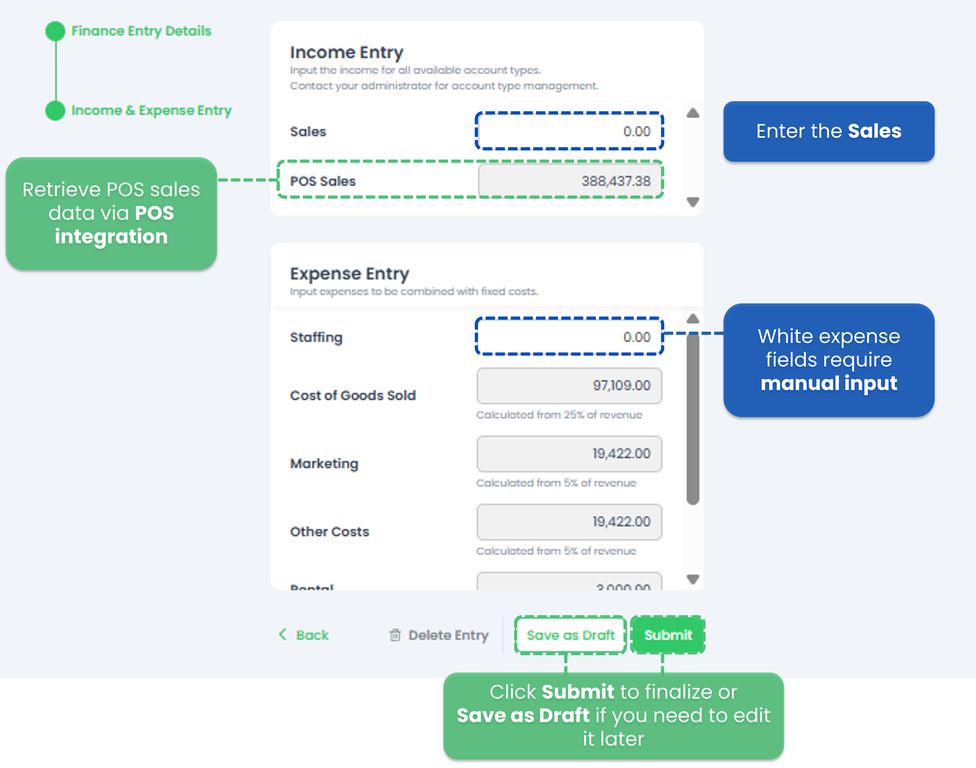
- POS integration is required to automatically retrieve sales data from your POS system.
- Expense values will be auto-calculated based on the Account List set up in Desk.
- White expense fields require manual input.
- Click Submit to finalize the Finance Entry, or Save as Draft if you need to edit it later.
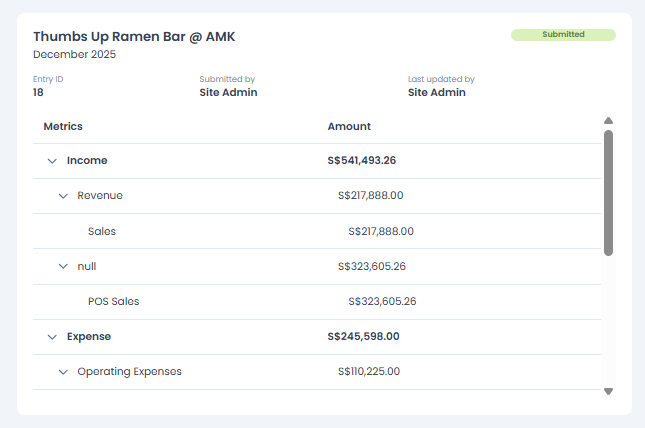
- After you submit your Finance Entry, it will be saved in the Finance Entry list. Make sure to remove the default filters (Draft and Pending Approval) to view submitted entries.
-
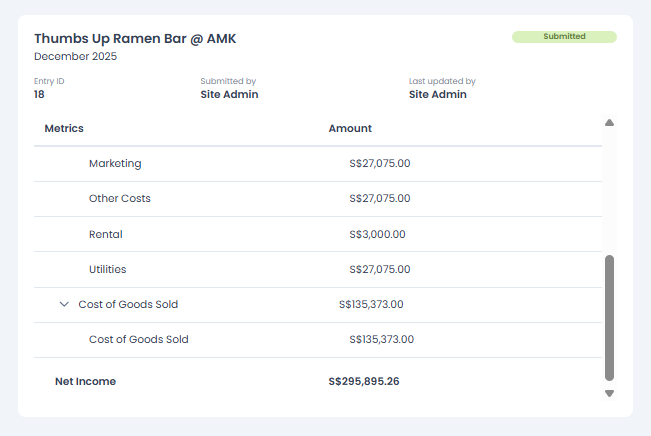
How to Delete a Submitted Finance Entry
- Once a Finance Entry is submitted, it becomes final and cannot be deleted.
The submitted data is immediately used in Financial Analytics.

- If you are not fully confident with the data or still require internal approval, it is strongly recommended to Save as Draft instead of submitting. Draft entries allow you to review and update the data without affecting analytics.
- When a Finance Entry is saved as Draft, the system records it for the selected unit/location and month.
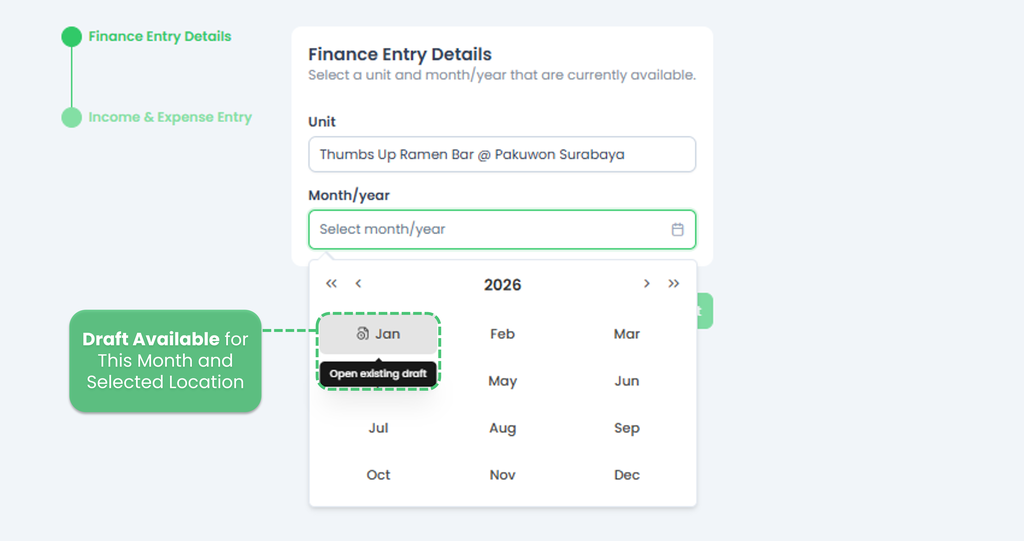 So if you create a new Finance Entry for the same unit, the month selection will display a Draft icon to indicate that a draft already exists. This helps prevent duplicate submissions and reminds you to complete the existing draft.