Adding a Supplier
This section covers:
What is Supplier in TreeAMS?
In TreeAMS, a Supplier refers to any party that provides products, materials, or services to a business unit. Suppliers can be:
- Internal 👉 such as the HQ or other branches within the network.
- External 👉 third-party vendors or service providers outside the network.
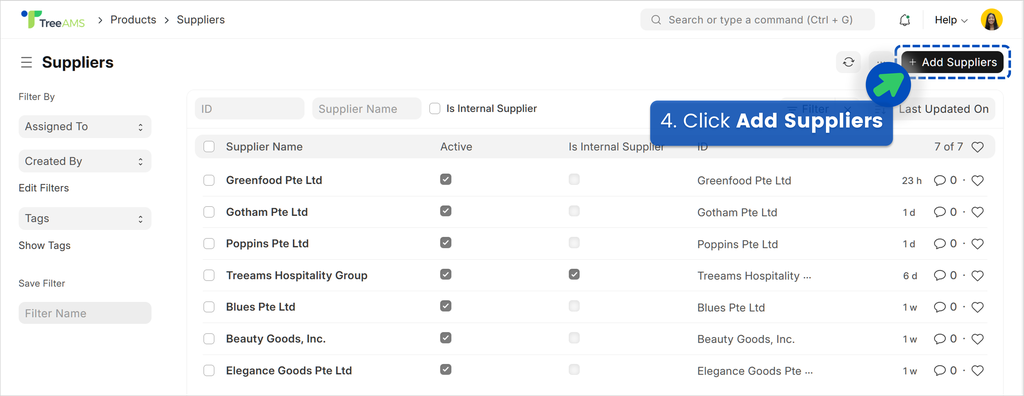
Adding an Internal Supplier
- Go to Desk. Learn how you can switch to Desk here!
- Go to Products
- Select Suppliers
- Click Add Suppliers
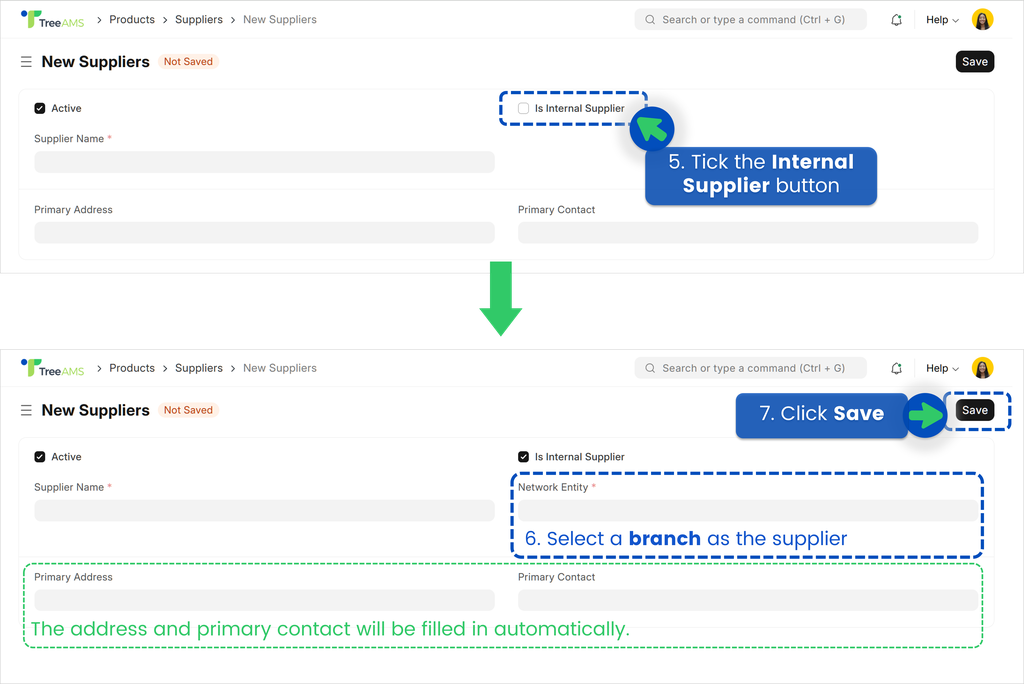
- Tick the Internal Supplier checkbox. This will display an additional field called Network Entity
- Select a branch as the supplier. You can also rename it in the Supplier Name field if needed. The address and primary contact will be filled in automatically as well
- Click Save

If you want to use a different address and primary contact, you can! Head to Adding an External Supplier for more details.
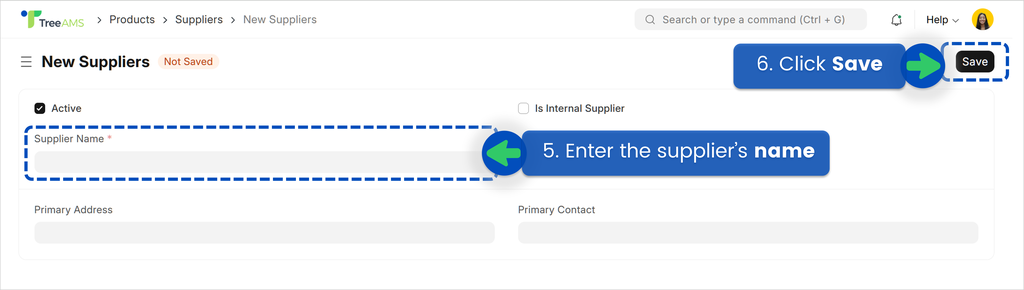
Adding an External Supplier
- Go to Desk. Learn how you can switch to Desk here!
- Go to Products
- Select Suppliers
- Click Add Suppliers
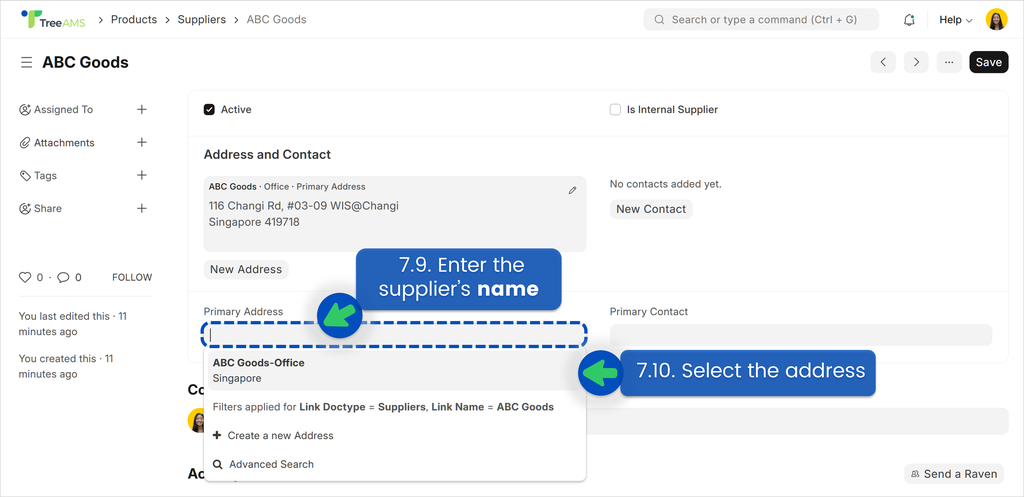
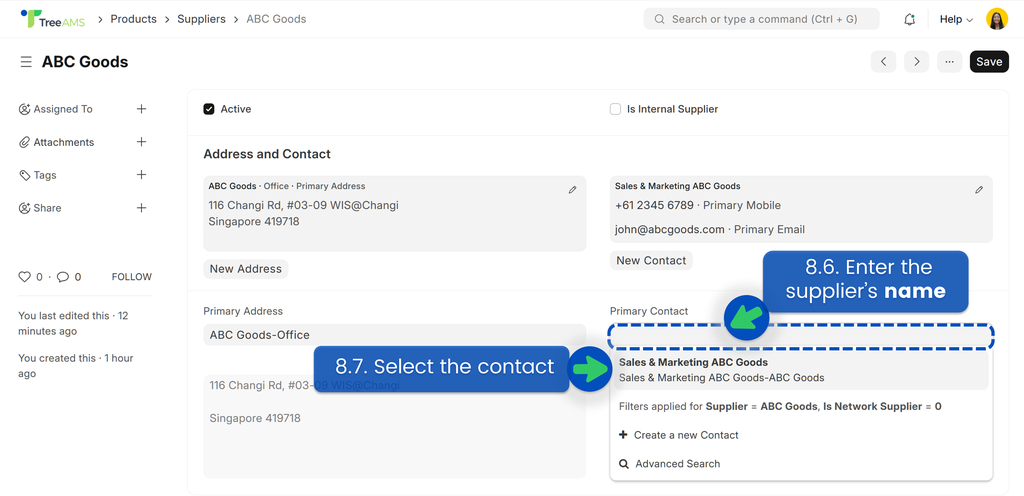
- Enter the supplier’s name.
- Click Save
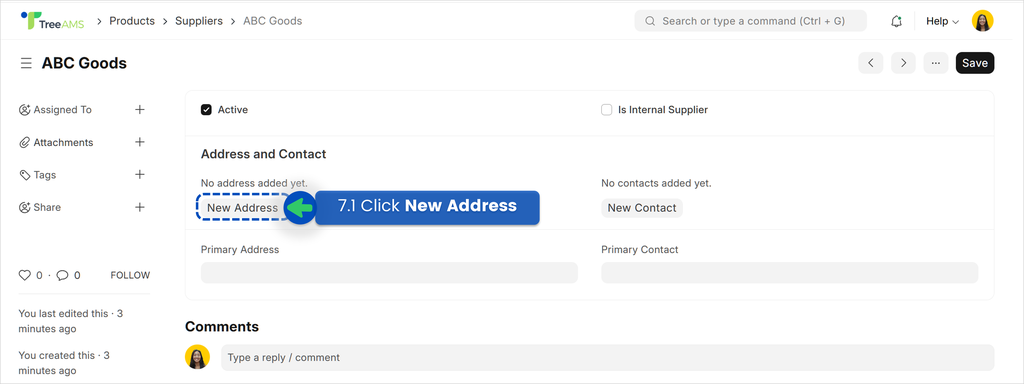
- Set the supplier’s Primary Address
- Click New Address
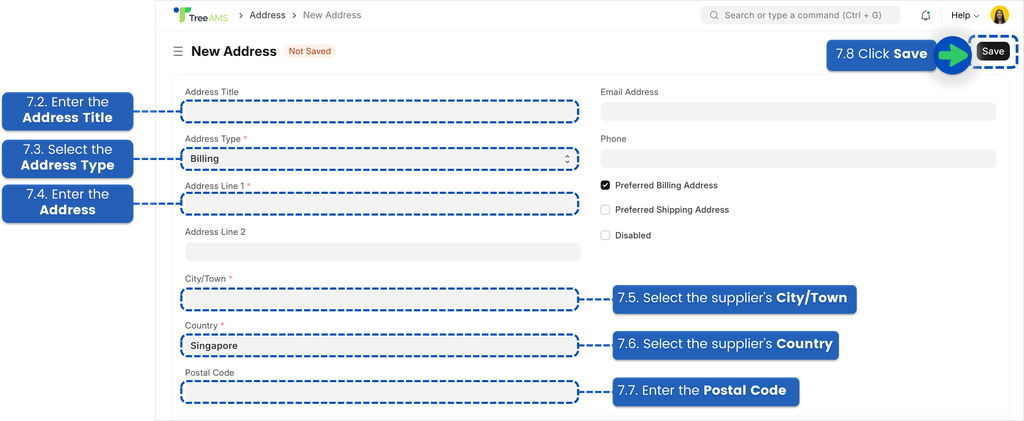
- Enter the Address Title
- Select the Address Type
- Enter the Address
- Select the supplier’s City/Town
- Select the supplier’s Country
- Enter the Postal Code
- Click Save
- To set your newly created address as the primary address, go to the Primary Address field and search for the supplier
- Select the address
Email Address and Phone fields are optional. You’ll need to enter the same information later when adding the Primary Contact, unless the supplier’s contact details differ from those of the Person-in-Charge or Primary Contact.
- Now, let's set the supplier’s Primary Contact. This is important because the system will email the supplier when product orders are placed.
⚠️ Note: Only one email can be set as the supplier’s contact, so make sure it’s active. You can also add a phone number as an alternative contact — it will appear when creating a new order in the product cart.
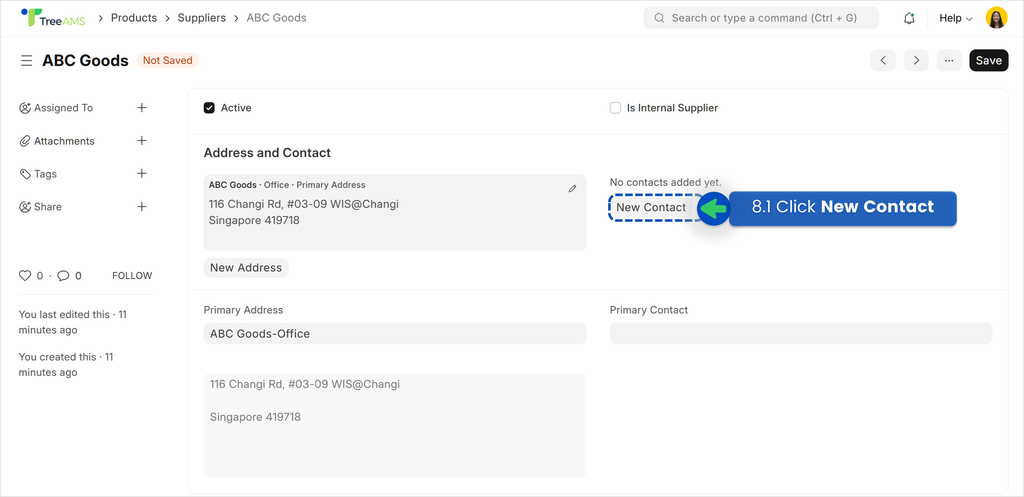
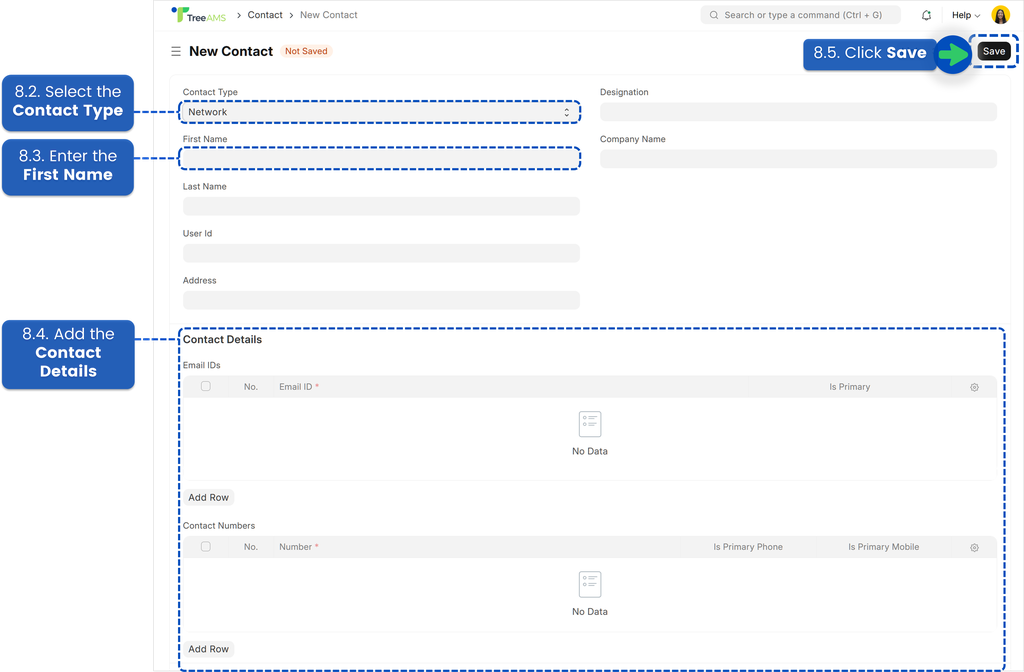
- Click New Contact
- Select the Contact Type. Here are the available options — choose the one that best describes the contact.
- Network
- Supplier
- Legal
- Asset
- Enter the First Name
- Add the Contact Details
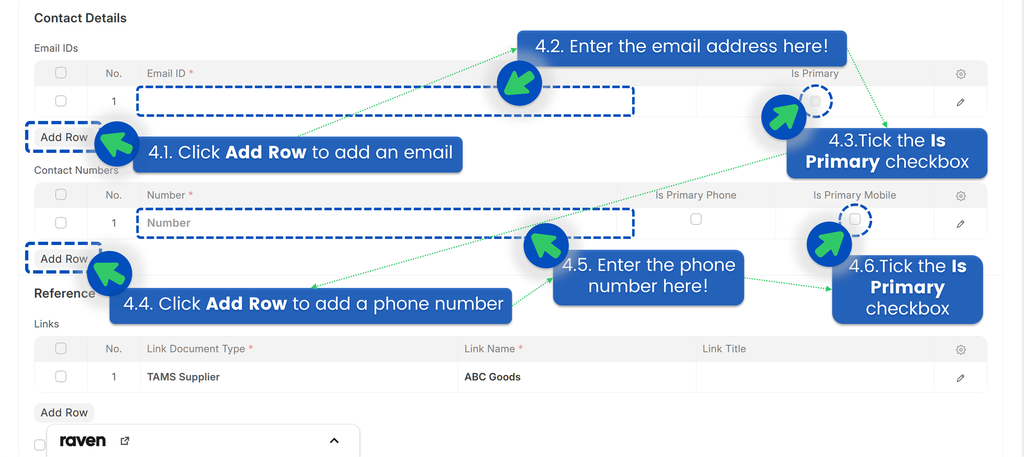
- Click Add Row to add an email
- Enter the email address here!
- Tick the Is Primary checkbox
- Click Add Row to add a phone number
- Enter the phone number here!
- Tick the Is Primary checkbox
- Click Save
- To set your newly created contact as the primary contact, go to the Primary Contact field and search for the supplier
- Select the contact
The rest of the fields are optional.
- Click Save