Assigning a Checklist
This section covers:
- Creating a Checklist Assignment
- Assign a Checklist
- Schedule a Checklist
- Delegate a Checklist
- Cancelling a Checklist Assignment
Creating a Checklist Assignment
- Go to Portal and click +Assignment.
- Select Assignment Type: Checklist. Then click Next.
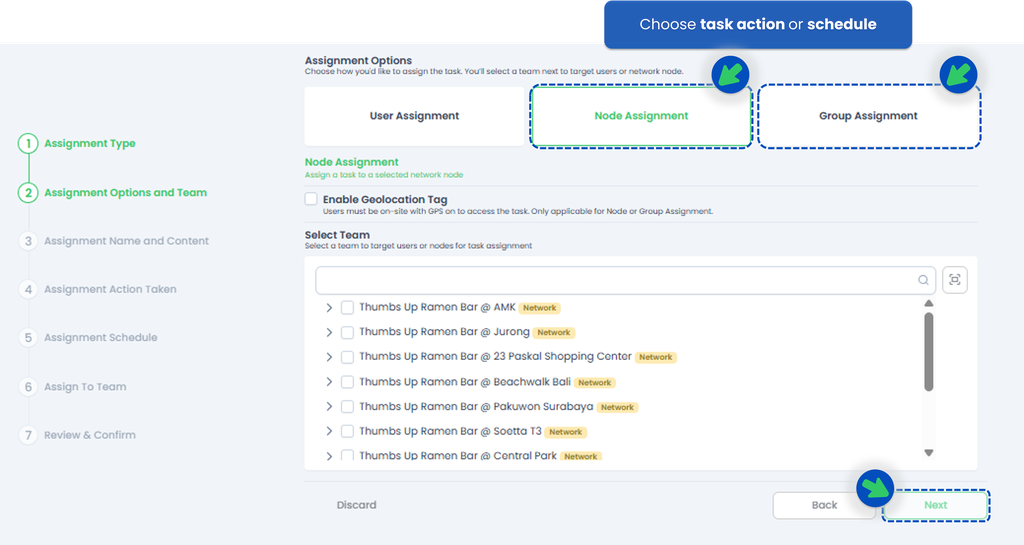
- Choose your Assignment Options and Team:
- Then, select the Checklist you want to assign. If you haven't created any Checklist, refer to This Link to start creating or adding your Checklist!
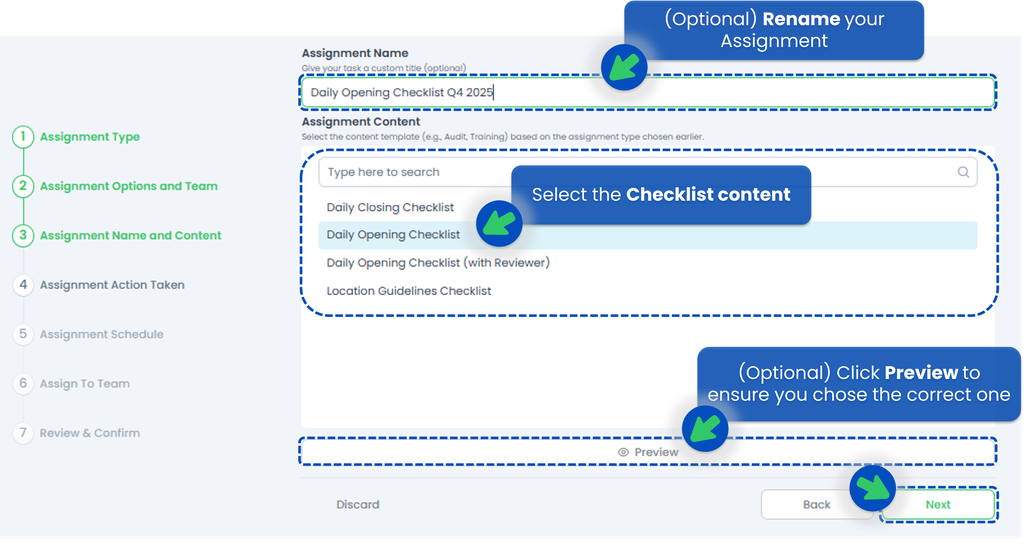
- This is optional but you can rename your Checklist Task!
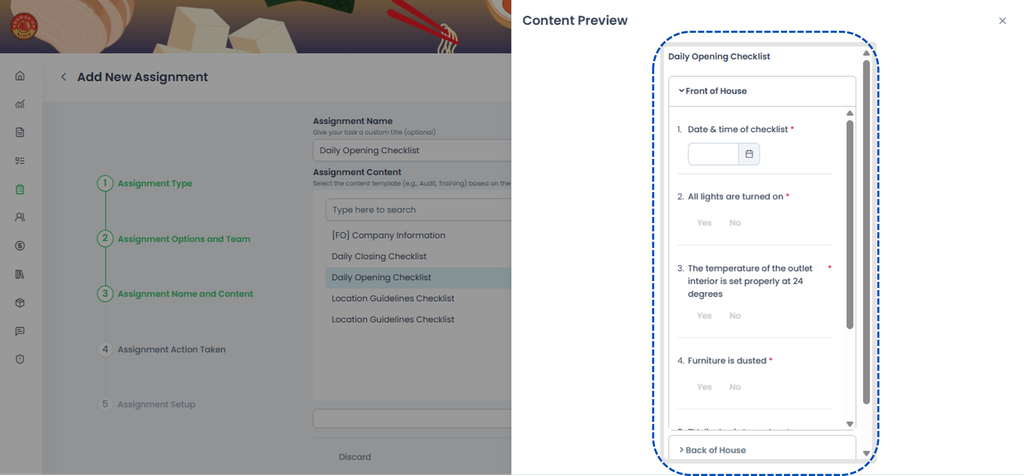
- You can also click "Preview" first to ensure you've selected the correct Checklist, then click Next.
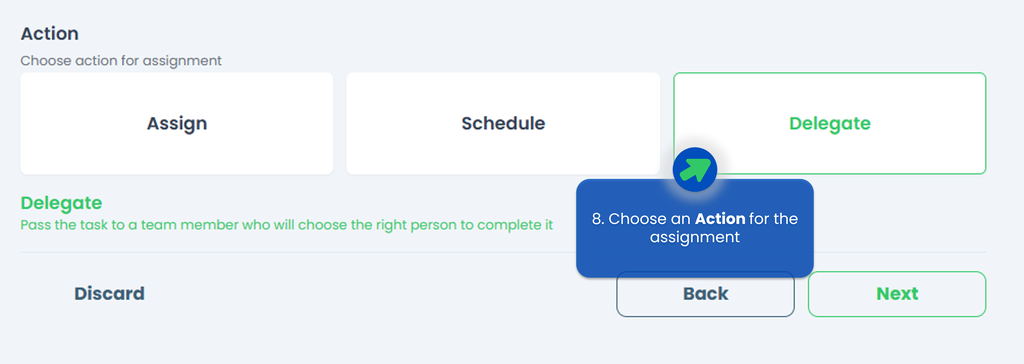
- Select an action for how and when the Checklist will be assigned to the selected team or users, then click Next. If your Checklist contains repetitive tasks, you can also select "Schedule" so the tasks repeat daily, for example, and you don’t have to create them manually each day.
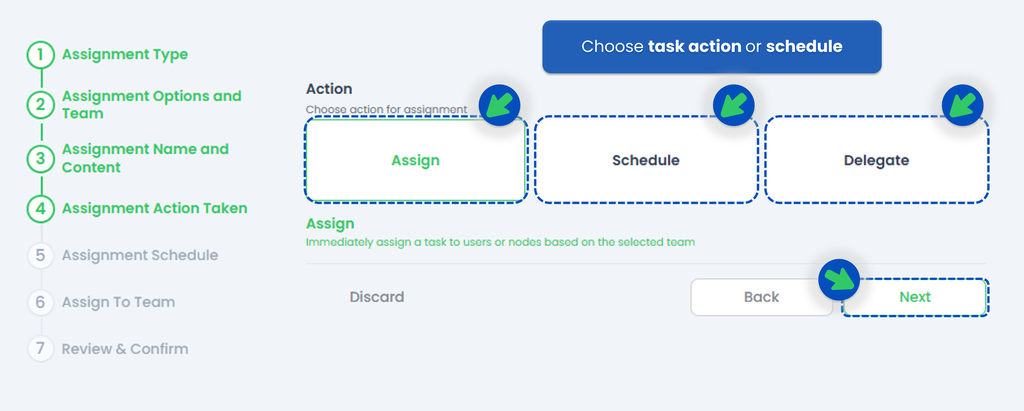
Please continue to the next step, which is either Assign, Schedule, or Delegate.
- Assign 👉 means designating at least one person to complete the Checklist. If you're unsure who the appropriate person in charge is but know someone who can identify them, consider using the Delegate feature.
- Schedule 👉 create regular and scheduled Checklists.
- Delegate 👉 instead of directly assigning the Checklist, you have the option to delegate it. This feature is especially helpful when you're unsure who is responsible for conducting the Checklist but know someone who can appoint the appropriate person.


Assign a Checklist
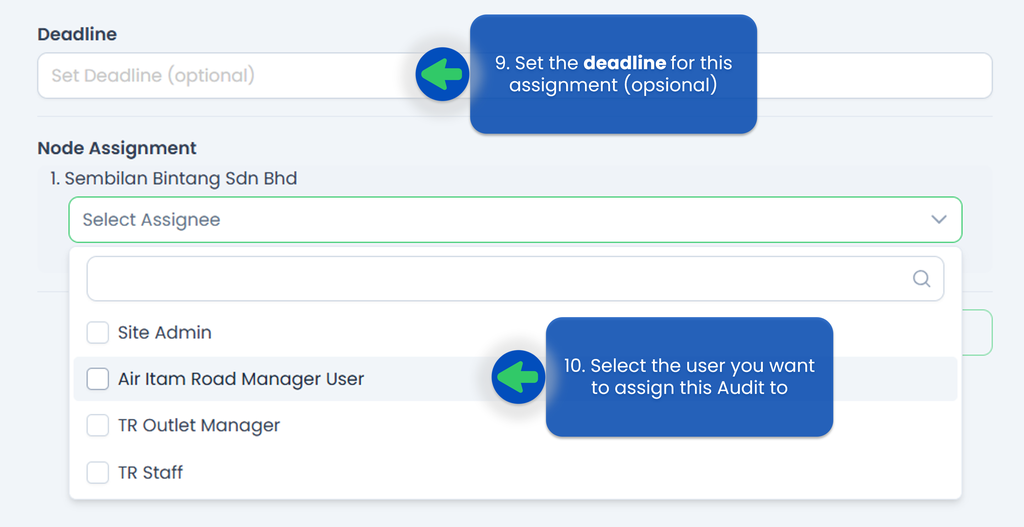
- In step 8, if you choose the Assign action, you will be able to send the Checklist at that time directly to the person responsible for it.

- Set a deadline for this assignment if you’d like!
- Select the person responsible to the Checklist.
- Click Submit.
- Your Checklist has been successfully assigned!
Schedule a Checklist
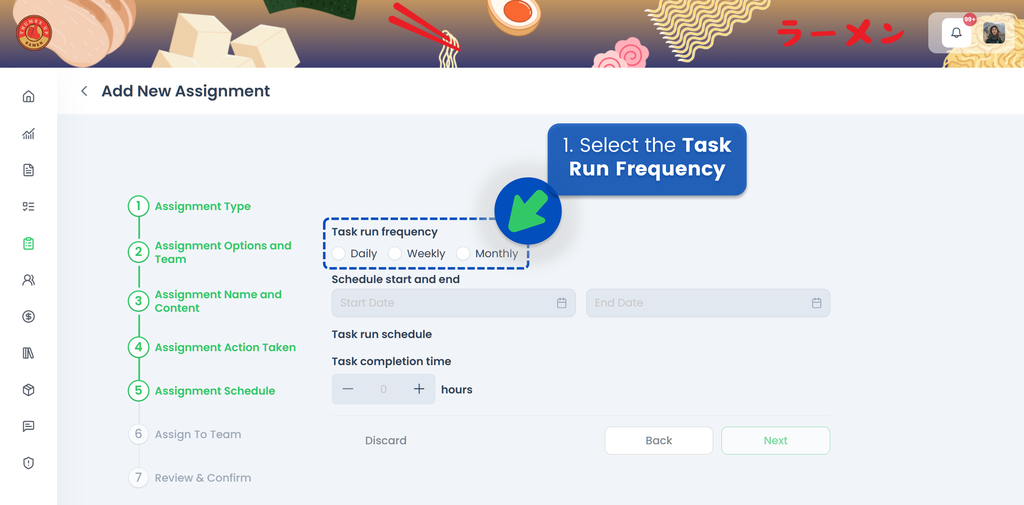
If you choose to Schedule your checklist, the next step is to select the Task Run Frequency, whether it's Daily, Weekly, or Monthly.
Watch the video below to understand how to set the scheduler,
🟢 Daily
- Select Daily for ther Task Run Frequency
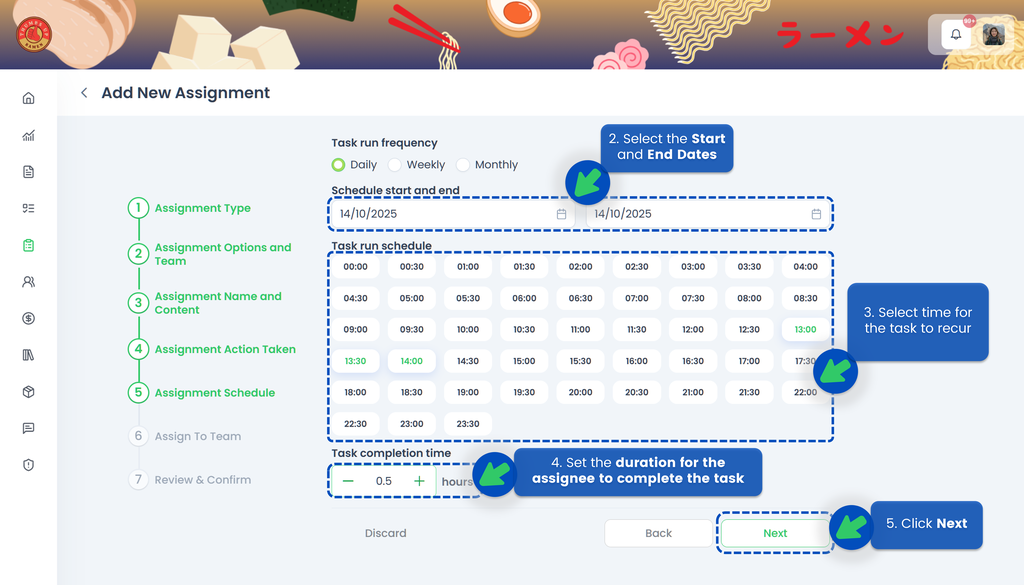
- Select the Start Date and the End Date of the assignment so the system knows when the schedule should become active and when it should end
- Select time for the task to recur
- Set the duration for the assignee to complete the task. If the assignee misses the deadline, the task will be automatically closed, and the system will indicate that the task was not completed on time
- Click Next
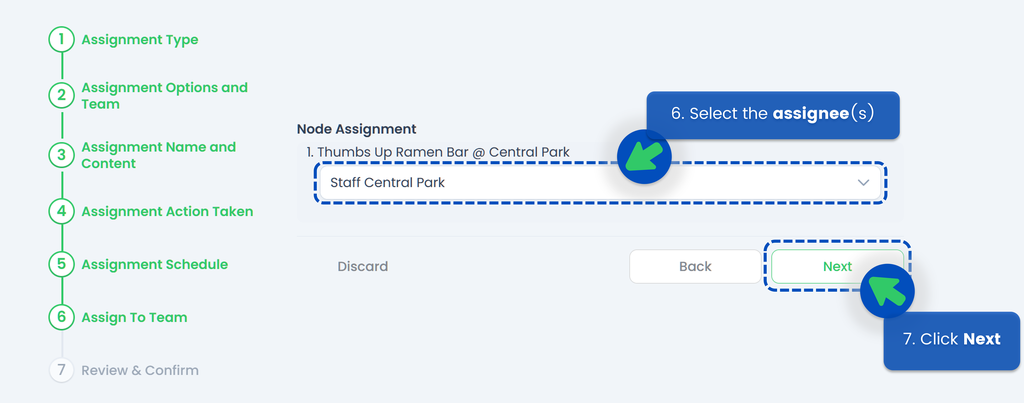
- Select the assignee(s)
- Click Next
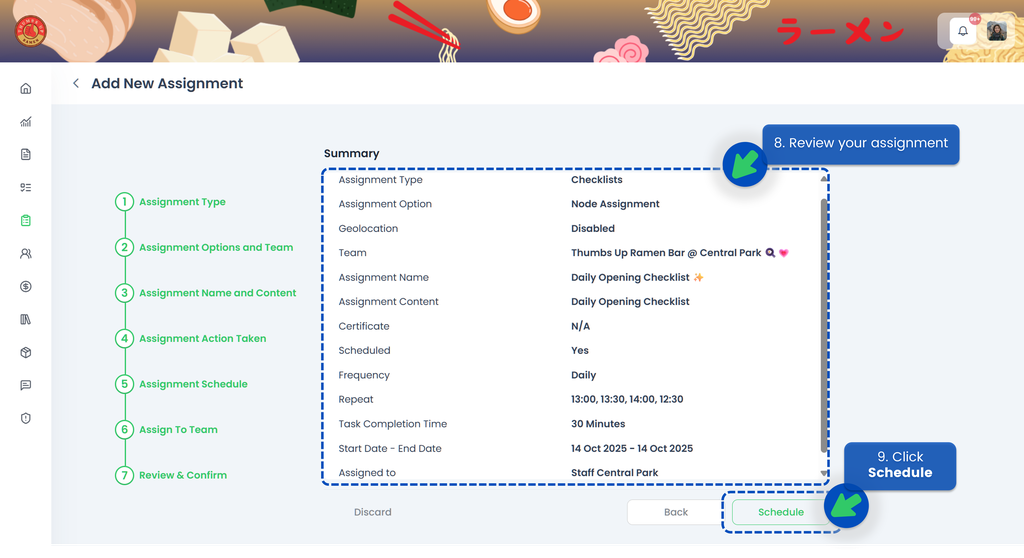
- Review your assignment. Make sure you’ve selected the correct start and end dates, timings, and assignee
- Click Schedule
🟢 Weekly
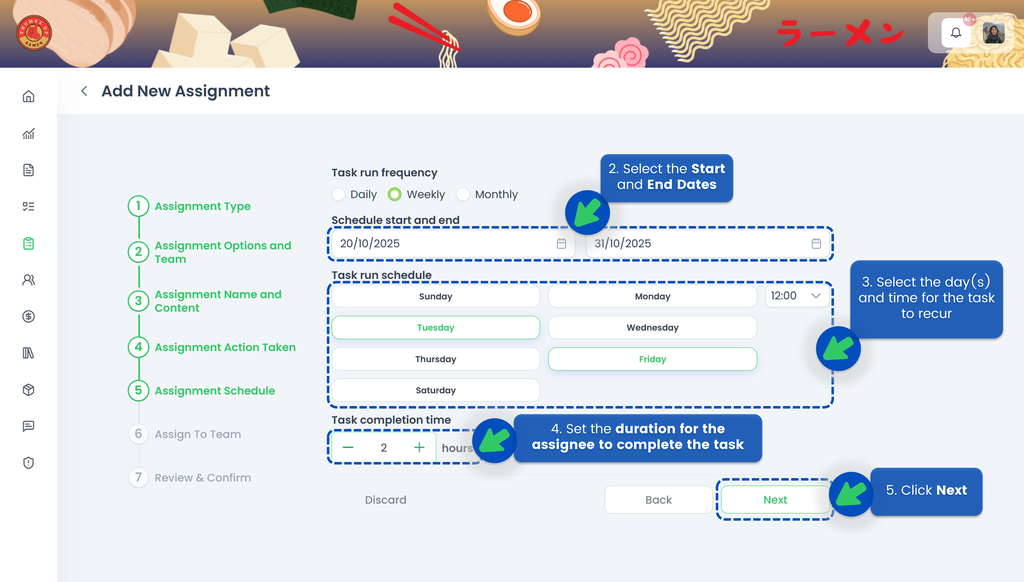
- Select Weekly for ther Task Run Frequency
- Select the Start Date and the End Date of the assignment so the system knows when the schedule should become active and when it should end
- Select the day(s) of the week and time for the task to be repeated
- Set the duration for the assignee to complete the task. If the assignee misses the deadline, the task will be automatically closed, and the system will indicate that the task was not completed on time
- Click Next
- Select the assignee(s)
- Click Next
- Review your assignment. Make sure you’ve selected the correct start and end dates, timings, and assignee
- Click Schedule
🟢 Monthly
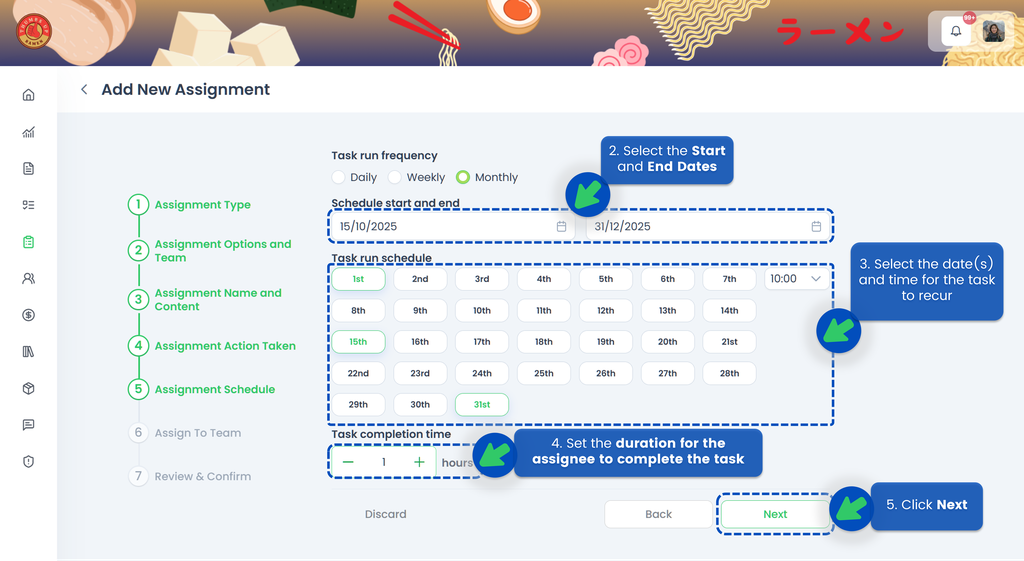
- Select Monthly for ther Task Run Frequency
- Select the Start Date and the End Date of the assignment so the system knows when the schedule should become active and when it should end
- Select the date(s) and time for the task to recur
- Set the duration for the assignee to complete the task. If the assignee misses the deadline, the task will be automatically closed, and the system will indicate that the task was not completed on time
- Click Next
- Select the assignee(s)
- Click Next
- Review your assignment. Make sure you’ve selected the correct start and end dates, timings, and assignee
- Click Schedule
💡 If a month does not have 31 days, the task will be created on the last day of that month. For example, if a task is scheduled to repeat on the 31st of each month, the task for February will be created on the 28th.
Delegate a Checklist
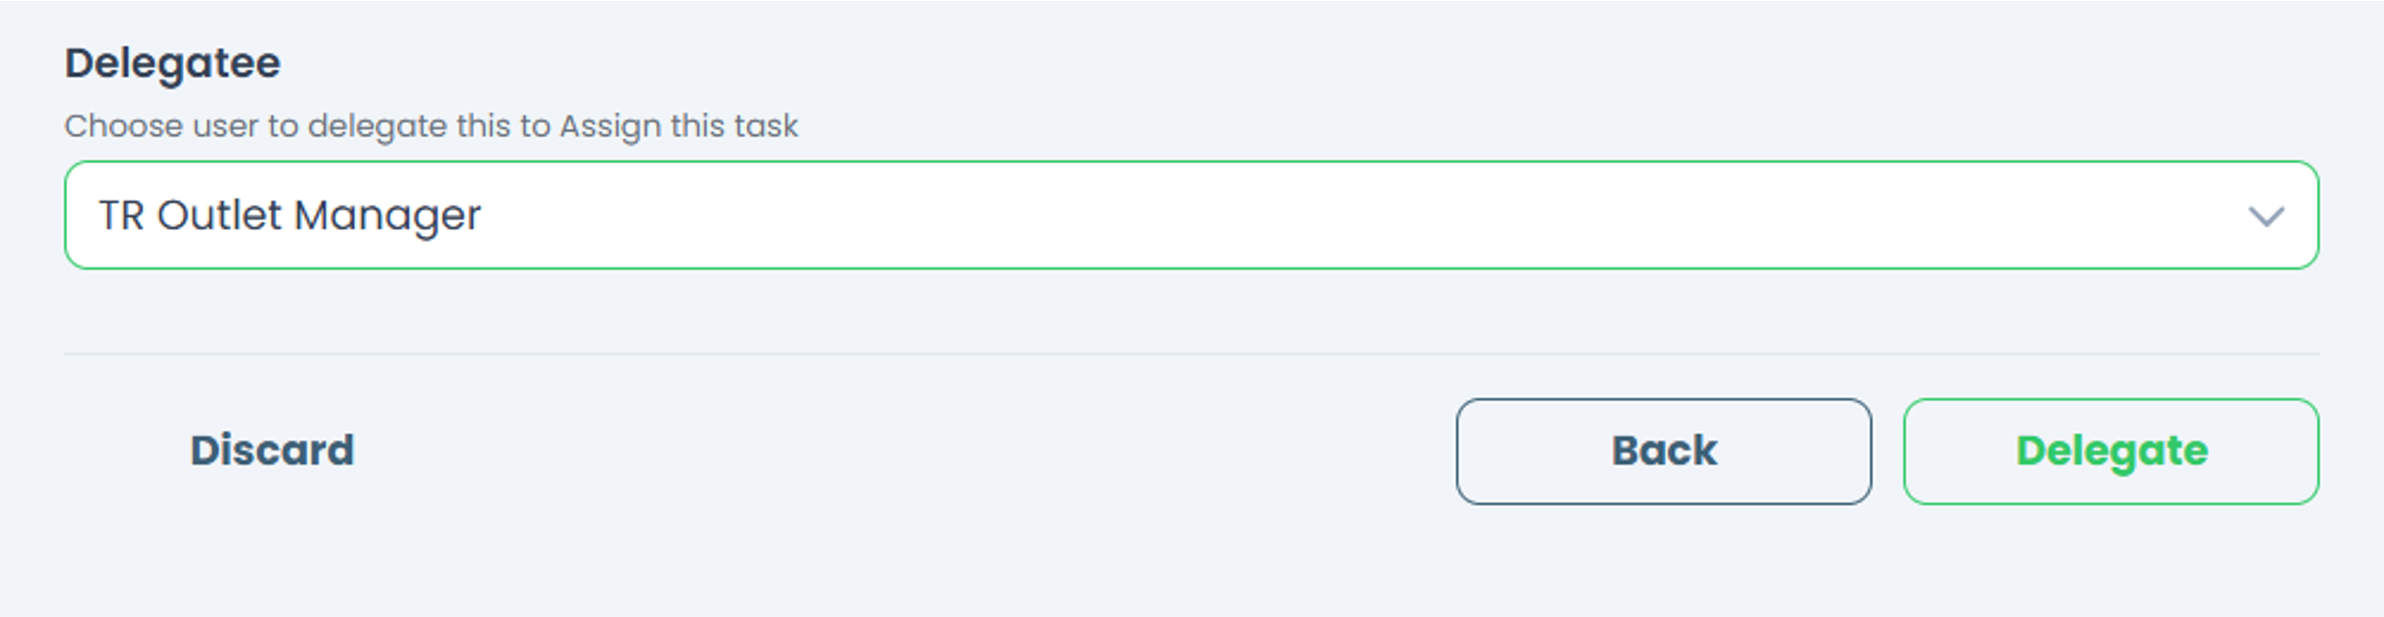
- In step 8, if you choose the Delegate action, you will be able to send the Checklist at that time to someone who can appoint the appropriate person (in case you don't know the person responsible for it, you can delegate to the Manager of the store for example).
💡 You can only delegate one user for each assignment!
IMPORTANT‼️ The Delegatee's role must be either a Site Admin or a Site User (with TreeAMS Assignment Manager as the sub-role). Remember! A Portal User cannot assign tasks as they are only allowed to do tasks.
- Click Delegate.
- Your Checklist has been successfully delegated!
Cancelling a Checklist Assignment
In TreeAMS, you can cancel Checklists in various statuses, including draft, assigned, delegated, and in progress. Follow the steps below for detailed instructions:
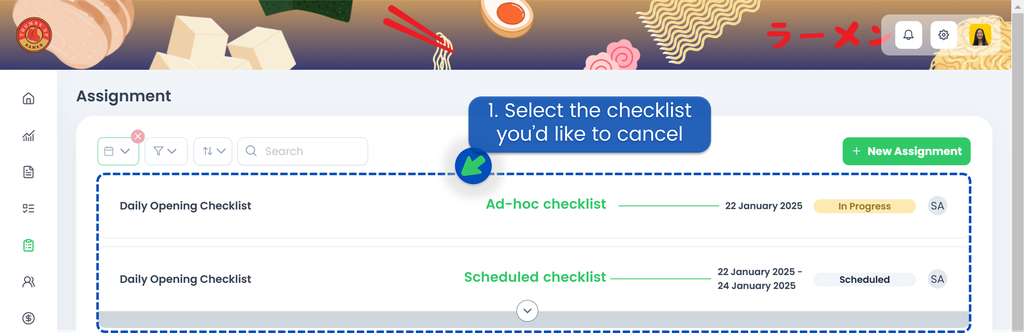
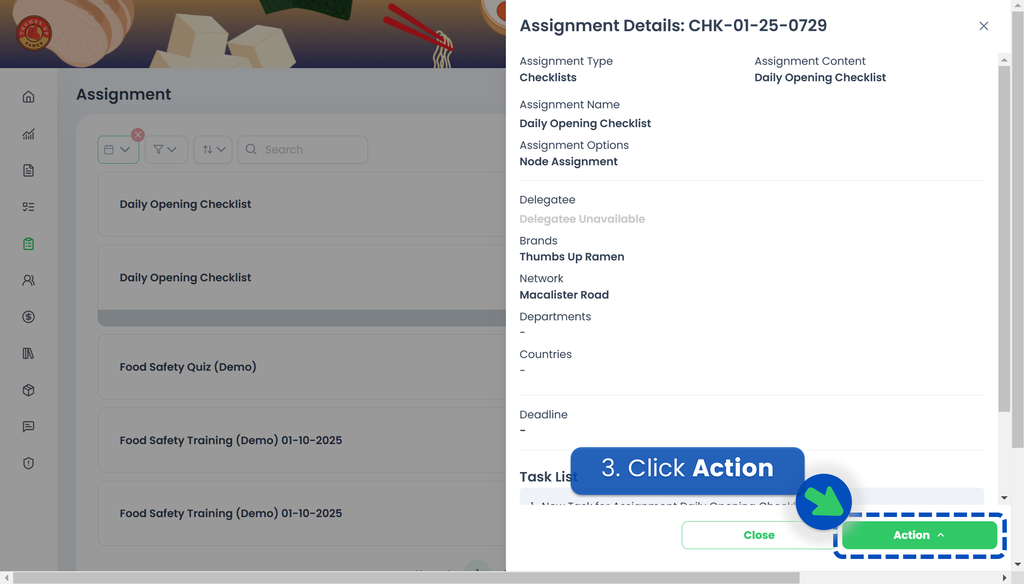
- Select the Checklist assignment you want to cancel.
- A pop up will appear on the right side.
- Click Action. Do note that depending on the checklist type i.e., ad hoc (single checklist) and scheduled, you'll see different options.
- For Ad Hoc Checklist, click Cancel Assignment.
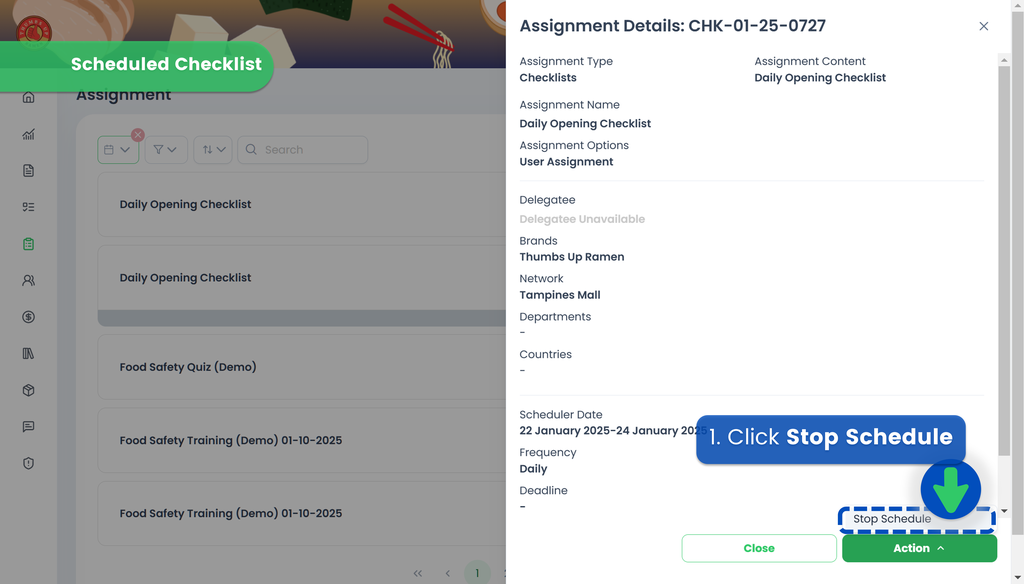
- For Scheduled Checklist:
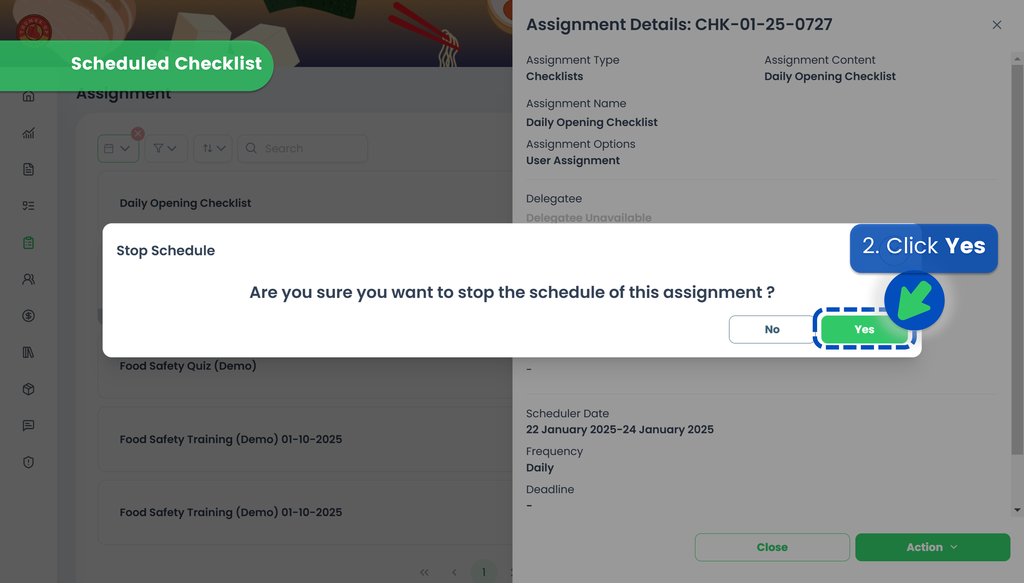
- Click Stop Schedule.
- Click Yes. With this step, the scheduler has been cancelled. To remove the checklist assigment, continue to Step 3!
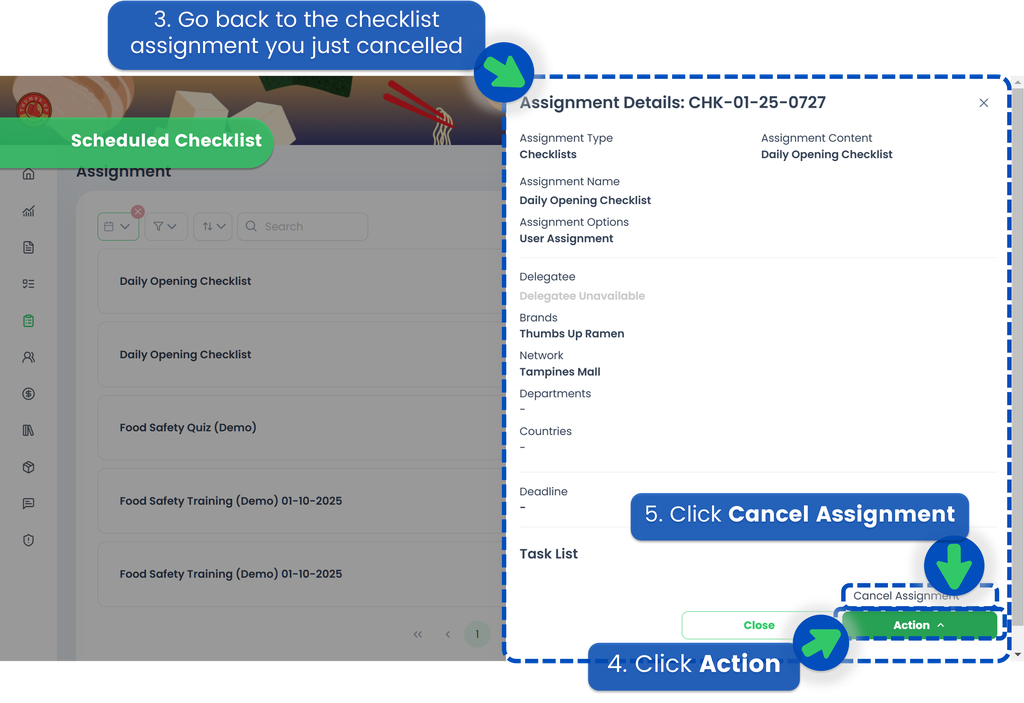
- Go back to the checklist assignment you just cancelled.
- Click Action.
- Click Cancel Assignment. This will remove the assignment, but the checklist content will be retained.