Set Up Issue Tracker
Before users can start raising and managing issues effectively, several configurations need to be completed in Settings:
- Setting Up Issue Types
- Setting Up Issue Fixer Team
- Setting Up Asset Types
- Setting Up Asset Lists
- Setting Up Vendor Details
1️⃣ Setting Up Issue Types
Purpose: Define what kinds of issues users can report.
To set up issue types, your role must be either a "Site Admin" or a "Site User with the TreeAMS Issue Manager sub-role". For more details on the different roles in TreeAMS, refer to User Types. If you're unsure of your role, please check with your manager, supervisor, or administrator.
- If you are on the Portal site, switch to Desk. Learn how you can switch from Portal to Desk here
- From the left menu, click the drop down icon next to the Issues menu
- Select Issues Setup
- Click Issue Types
- To add a new Issue Type, click + Add TAMS Issue Type.
- Enter your Issue Type Name.
- Choose when the issue will be closed automatically. It can be auto-closed in days, hours, or minutes. If you put 0, then this Issue Type will not auto-close.
- Select the Department that will solve this Issue Type. If you have not set up any departments, you can go to Creating a Department for a step-by-step guide on how to create departments.
- Lastly, click Save!


2️⃣ Setting Up Issue Fixer Team
Purpose: Define who is responsible for resolving specific issues.
🚨 Note: The Issue Type’s department must match the Issue Fixer Team’s department.
This means that for every Issue Type, there must be at least one team under the assigned department with "Issues" enabled as the team type. Refer to the illustration below for an example.

Here is how you can create an Issue Fixer Team:
- If you are on the Portal site, switch to Desk. Learn how you can switch from Portal to Desk here.
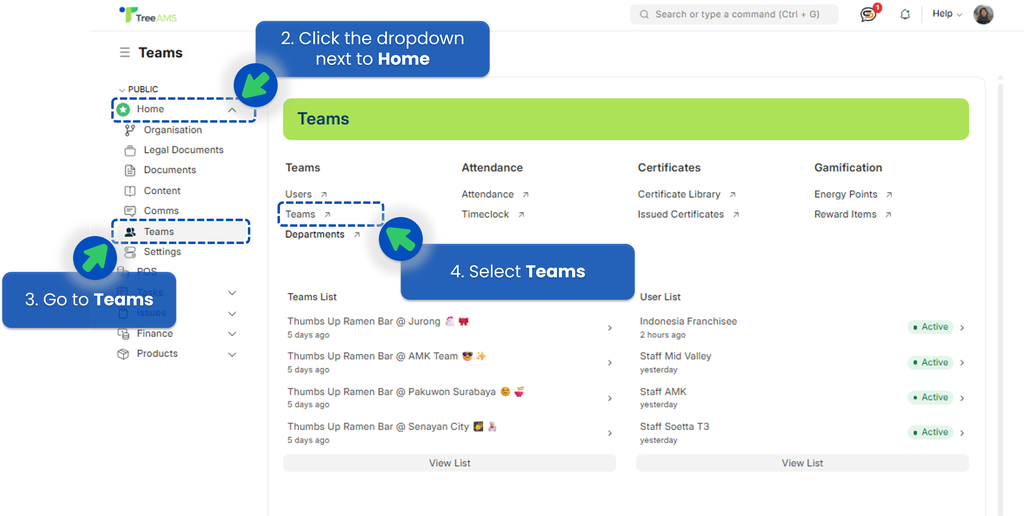
- From the left menu, click the drop down icon next to the Home menu.
- Select Teams
- Click Teams
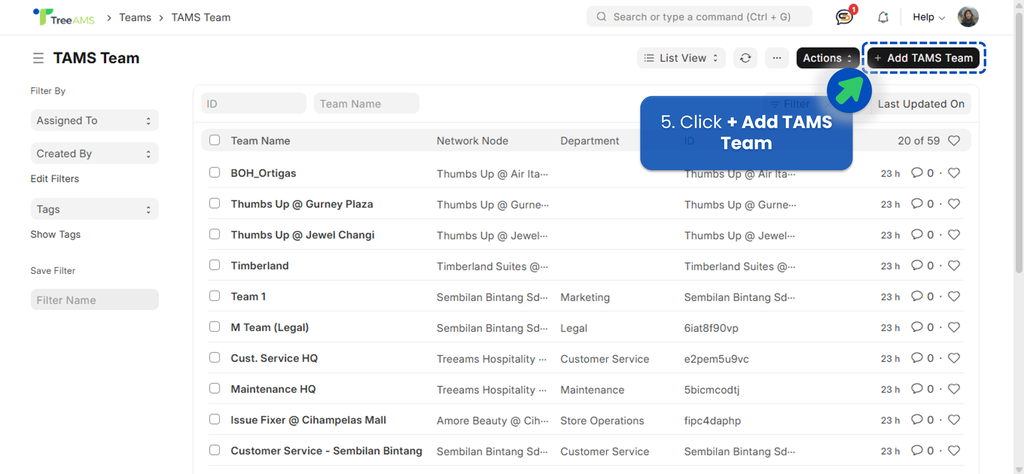
- To add a new Issue Fixer Team, click + Add TAMS Team.
- Define the location or network node that this Issue Fixer Team is responsible for.
- Create a clear team name based on responsibility. Recommended examples: HQ-Maintenance Team, HQ-IT Team, etc.
- Select "Issues" as the Team Type (this is mandatory). This allows the team to receive and handle issue assignments.
- Set the department to match the department defined in the related Issue Type (e.g., Maintenance, IT, Operations).
- Add Team Members or users who will be responsible for fixing issues assigned to this team.
- Click Save. Refer to this link to view details for all team setup fields: click here

Once you’ve set up the Issue Fixer Team, you need to assign it to the relevant network so issues can be routed correctly.
- While still on Desk, go to the Home page by clicking the TreeAMS icon on the top left corner.
- Click the dropdown icon next to Home.
- Go to Organisation
- Select Network Structure
- Choose the relevant Unit or Branch, then click Edit
- Find Default Issue Team and select the corresponding Issue Fixer Team. You can assign more than one team if needed.
- Click Save. If you select a Branch, you will be prompted to choose whether to
- Apply this update to direct descendants only — Applies the update only to the immediate child units under the selected branch, or
- All Descendants — Applies the update to all units under the branch, including every sub-level below it.


3️⃣ Setting Up Asset Types
- If you are on the Portal site, switch to Desk. Learn how you can switch from Portal to Desk here.
- From the left menu, click the drop down icon next to the Issues menu.
- Select Issues Setup
- Click Asset Types
- Select +Add TAMS Asset Type

- Enter the Asset Type (Name), and select the existing Issue Type as the Default Issue Type.
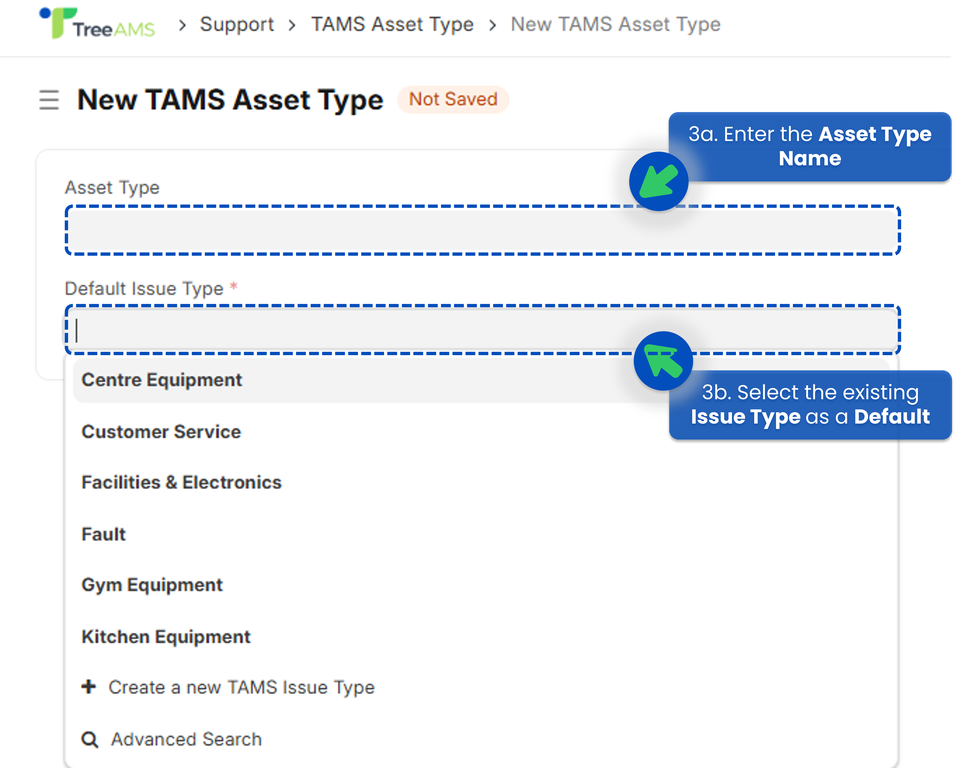 This helps the system automatically suggest the most common issue for that asset, so you don’t need to select it manually each time an issue is submitted. If the issue type you want to set as default isn’t available yet, you can add a new one by clicking 'Create a New TAMS Issue Type'.

4️⃣ Setting Up Asset List
To set up asset lists, your role must be either a Site Admin or a Site User with the TreeAMS Issue Manager sub-role. For more details on the different roles in TreeAMS, refer to User Types. If you're unsure of your role, please check with your manager, supervisor, or administrator.
- If you are on the Portal site, switch to Desk. Learn how you can switch from Portal to Desk here.
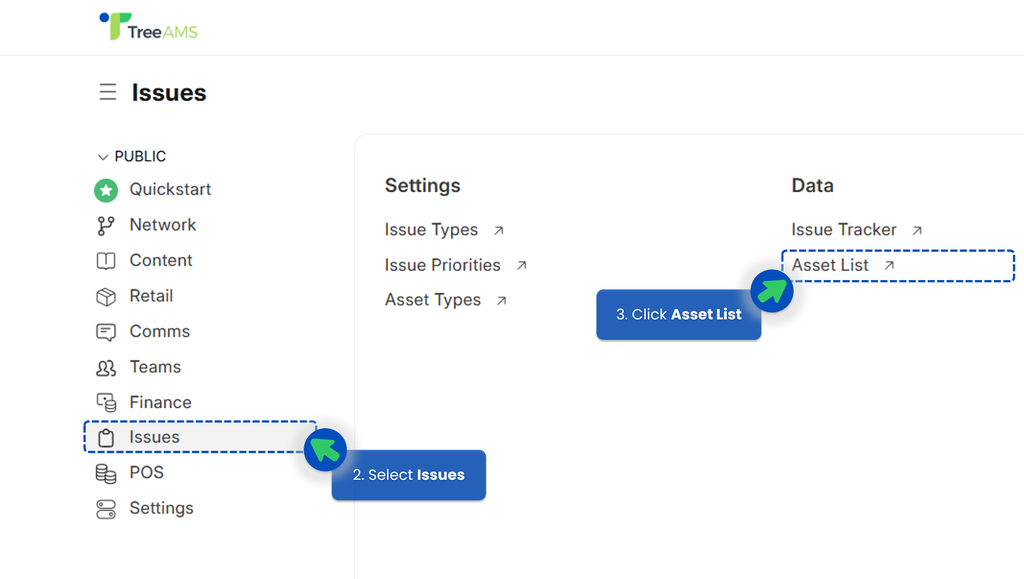
- From the left menu, select Issues.
- Click Asset Lists.
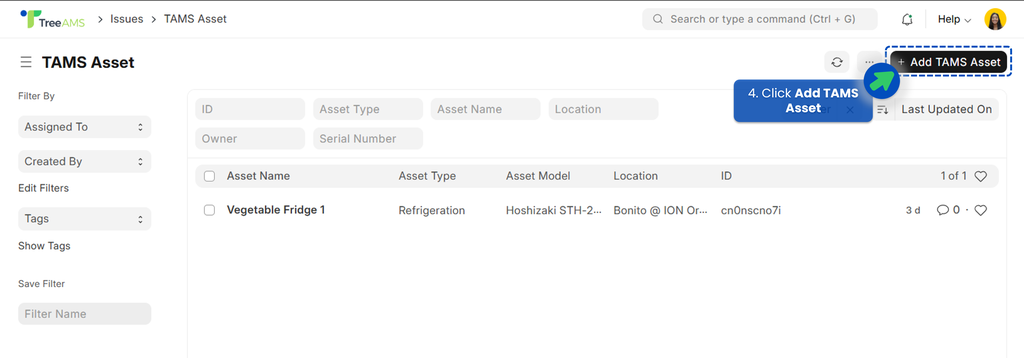
- To add a new Asset Lists, click + Add TAMS Asset.
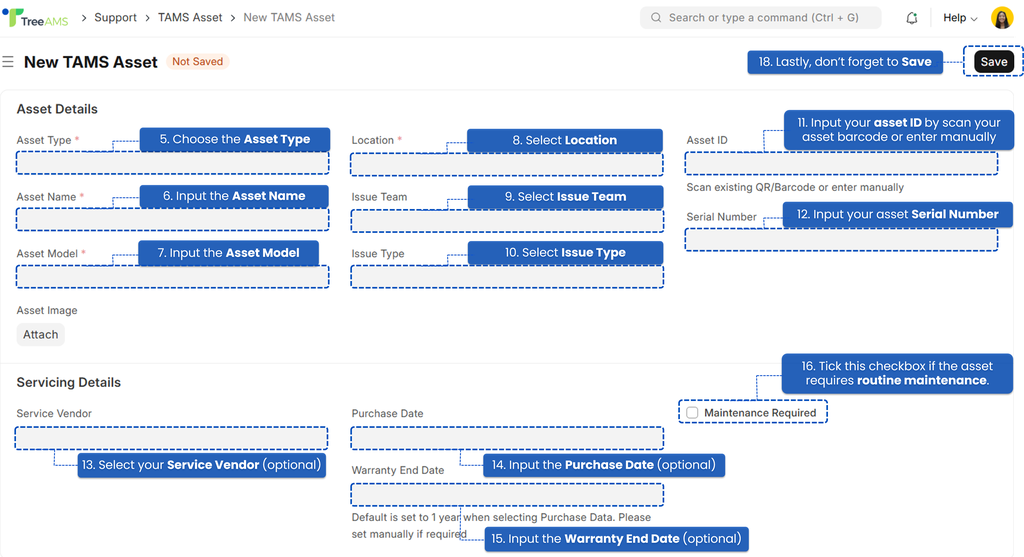
- Fill in all the necessary information related to your asset. Choose the Asset Type (Required field), select the type/category of asset you are registering. If you don't see the asset type that you need, you can click "Create a New TAMS Asset Type". Refer to Setting Up Asset Types for more details.
- (Required field) Input the Asset Name, enter a name that identifies the asset clearly.
- (Required field) Input the Asset Model, provide the specific model of the asset.
- (Required field) Select the Location, choose the asset's physical location. This field is connected to your network node, so make sure you have also set the location of your network.
- (Optional) Select Issue Team, choose the team responsible for handling the issue. Example: Maintenance Team, IT Team, Facility Team, etc. Or you can just left it blank.
- (Required field) Select Issue Type, select the type of issue occurring with the asset. If you haven't create your Issue Type, refer to setting-up-issue-types. Setting up this field is very important because it will link the issue's asset with the issue fixer department.
- Input the Asset ID, scan the asset’s QR/barcode or manually enter the Asset ID.
- Input the Asset Serial Number, fill in the unique serial number of the asset.
- (Optional) Select the Service Vendor, choose the service vendor responsible for the asset (if any).
- (Optional) Input the Purchase Date, enter the date when the asset was purchased.
- (Optional) Input the Warranty End Date, provide the end date of the asset’s warranty period.
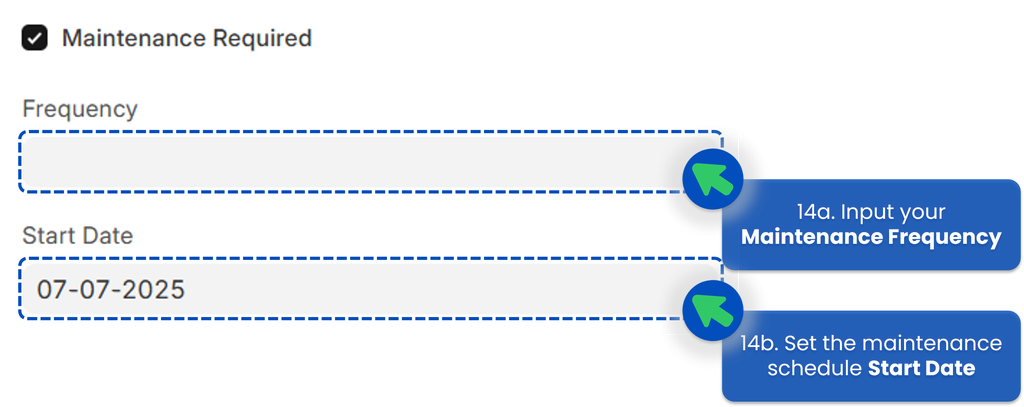
- (Optional) Tick the "Maintenance Required" Checkbox. Check this box if the asset needs regular/routine maintenance. Choose how often the asset should be maintained — it can be in days, hours, or minutes — snd select a specific maintenance date. If you leave the frequency field blank, the maintenance will not repeat.
- The description of each tab as follows:

- Lastly, click Save!
5️⃣ Setting Up Vendor Details
Purpose: Capture servicing and vendor-related information for issue resolution.
- If you are on the Portal site, switch to Desk. Learn how you can switch from Portal to Desk here
- From the left menu, click the drop down icon next to the Issues menu
- Select Issues Setup
- Click Service Provider
- To add a new Issue Type, click + Add TAMS Service Provider.
- Define service information such as:

- Provider Name — Enter the name of the service provider or vendor.
- Primary Address — Specify the main address of the service provider.
- Primary Contact — Add the main contact person or contact details for coordination.
- Lastly, click Save!


After setting up the service provider, it will appear in the portal view when users raise a new issue or edit an already submitted issue form.

