Branch & Unit Details
In TreeAMS, you can store unit or branch-related information in the respective unit or branch. This enables you to find information such as the contact person, branch or unit address, related documents, etc. in one place.
This section covers:
Adding Branch Details
- Go to Desk. Learn how you can switch to Desk here!
- Click Organisation
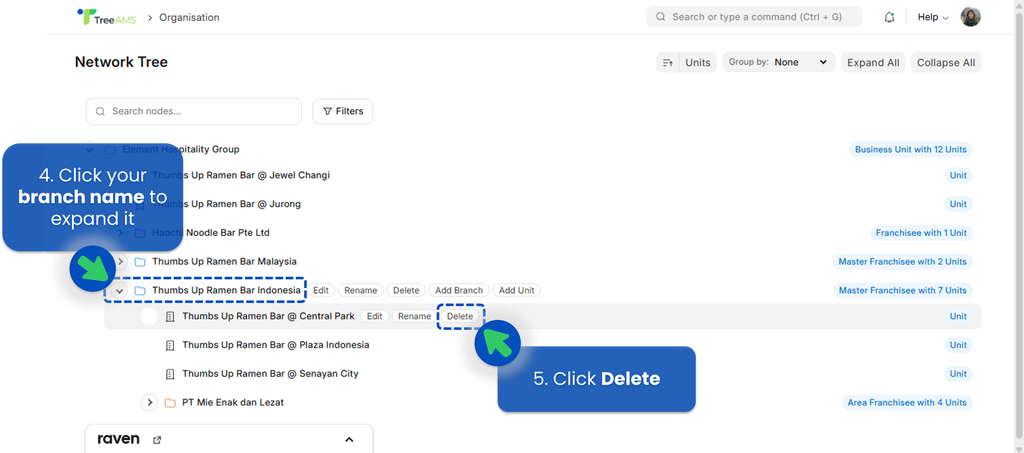
- Go to Organisation Tree View
- Hover over your company or branch name so that the left menu will appear
- Click Edit
- Start entering or updating the information, and don’t forget to save your changes!
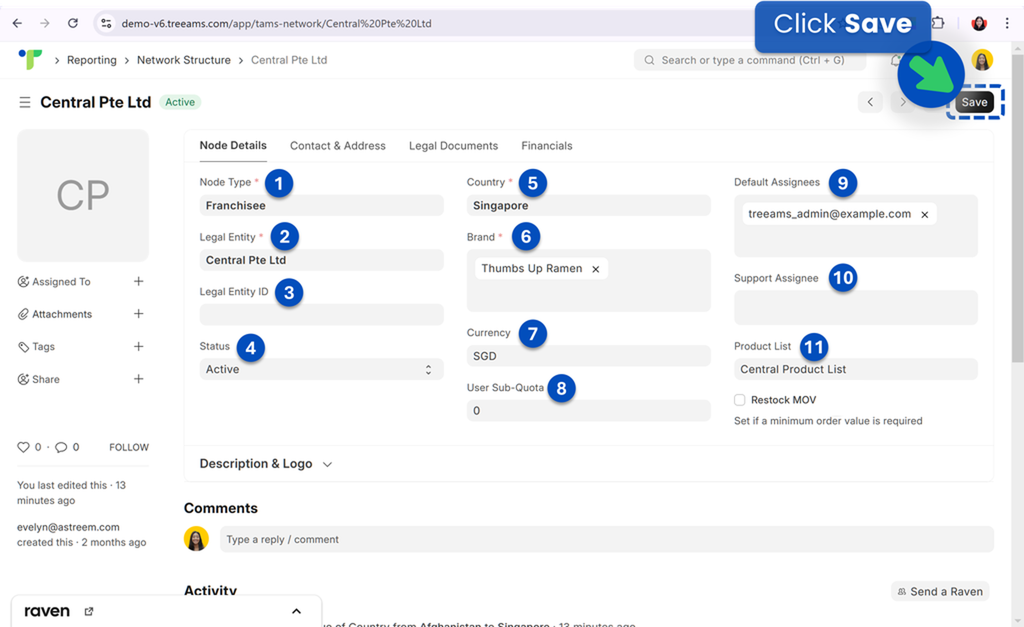
- Node Type 👉 is the branch type. It can be a franchisee or even a subsidiary. Refer to Branch Types to learn more about available branch types in TreeAMS
- Legal Entity 👉 is the registered name of the company.
- Legal Entity ID 👉 is the company's registration number.
- Status 👉 is the status of the branch. You have three options, which are (1) Active, (2) Inactive, and (3) Terminated. With this field, you can still include all of your previous franchisees for records.
- Country 👉 is the country where the branch is in.
- Brand 👉 by default, this will be your brand and can't be changed!
- Currency 👉 currency used by the branch.
- User Sub-Quota 👉 number of users the branch is entitled to.
- Default Assignees 👉 the main person in charge of the Branch. It is recommended that you put at least one person in charge like the Store Manager and/or someone from HQ as the default assignee. This is important especially when you want to use the Document Reminder or Retail feature.
- Support Assignee 👉 refers to team members in charge of the branch.
- Product List 👉 refers to the list of products owned or managed by this specific branch or unit. Learn more about Products here
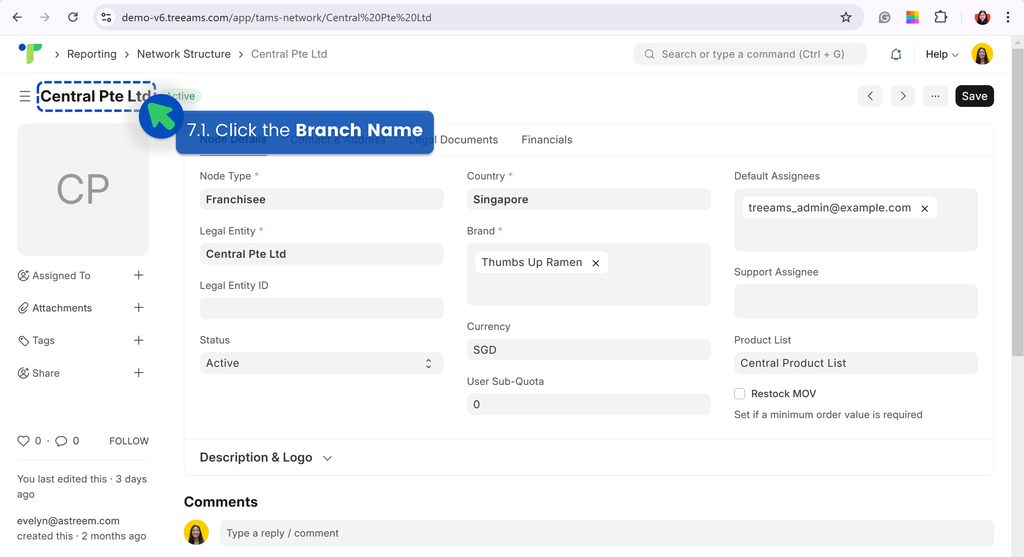
- If you need to change your Branch name, please follow below instructions:
- Click the Branch name
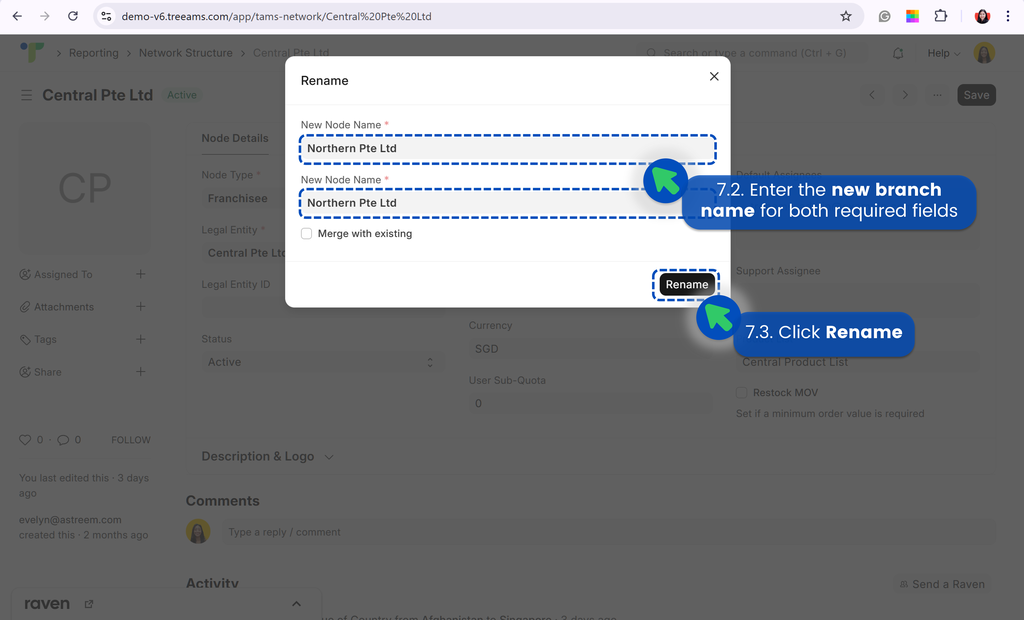
- Enter the new branch name for both required fields
- Click Rename

Adding Unit Details
- Go to Desk. Learn how you can switch to Desk here!
- Click Organisation
- Go to Organisation Tree View
- Hover over your unit name so that the left menu will appear
- Click Edit
- Start entering or updating the information, and don’t forget to save your changes!
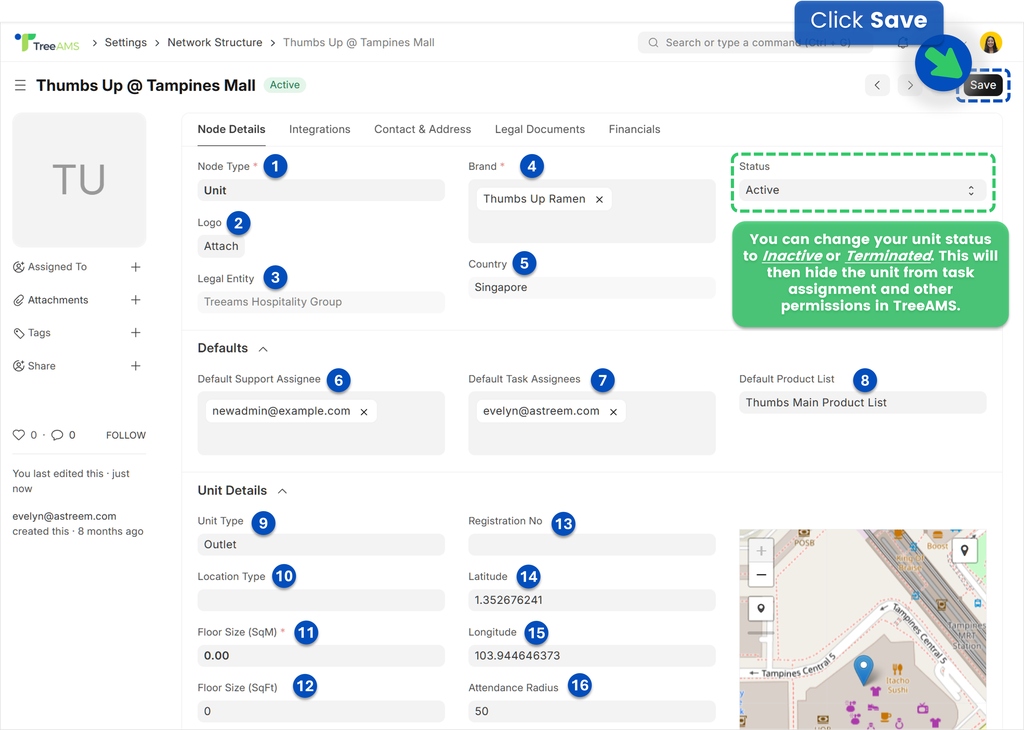
- Node Type 👉 Defines the type of entity. For a Unit, the Node Type must be set to Unit.
- Logo 👉 Optional. You may upload a unit-specific logo here.
- Legal Entity 👉 Refers to the registered company name. For a Unit, the Legal Entity will automatically follow the Legal Entity of the branch that owns the unit.
- Country 👉 Indicates the country where the unit is located. For a Unit, this will follow the country of the branch that owns the unit.
- Brand 👉 Select the brand that this unit belongs to.
- Default Support Assignee 👉 Refers to the team members responsible for handling issue resolutions for this Unit.
- Default Task Assignees 👉 The main person(s) in charge of this Unit. It is recommended to assign at least one person—such as a Store Manager and/or someone from HQ—as the default assignee. This is especially important if you are using features like Document Reminder or Products Management.
- Default Product List 👉 Displays the product list used by this Unit under the Products feature. Each unit can have a separate product list to differentiate available items.
- Unit Type 👉 Defines the classification of your business locations based on their operations. Examples include Flagship, Dine-In Outlet, or Delivery-Only. Setting Unit Types helps manage permissions and operations more effectively according to each unit’s specific needs..
- Location Type 👉 Categorizes your business sites based on their physical setup or function. Examples include Mall-Based Store, Standalone Outlet, or Office Space.
- Floor Size (SqM) 👉 Specifies the size of the Unit in square meters. This is useful in the Analytics module for calculating rental or operational costs.
- Floor Size (Sqft) 👉 Specifies the size of the Unit in square feet. Similar to SqM, this helps determine rental or operational costs within the Analytics module.
- Registration No 👉 The business registration number of the Unit.
- Latitude 👉 The geographical latitude of the Unit.
- Longitude 👉 The geographical longitude of the Unit.
- Attendance Radius 👉 Defines how close a user must be (in meters) to clock in/out or perform tasks when proximity tracking is enabled in the Assignment settings.
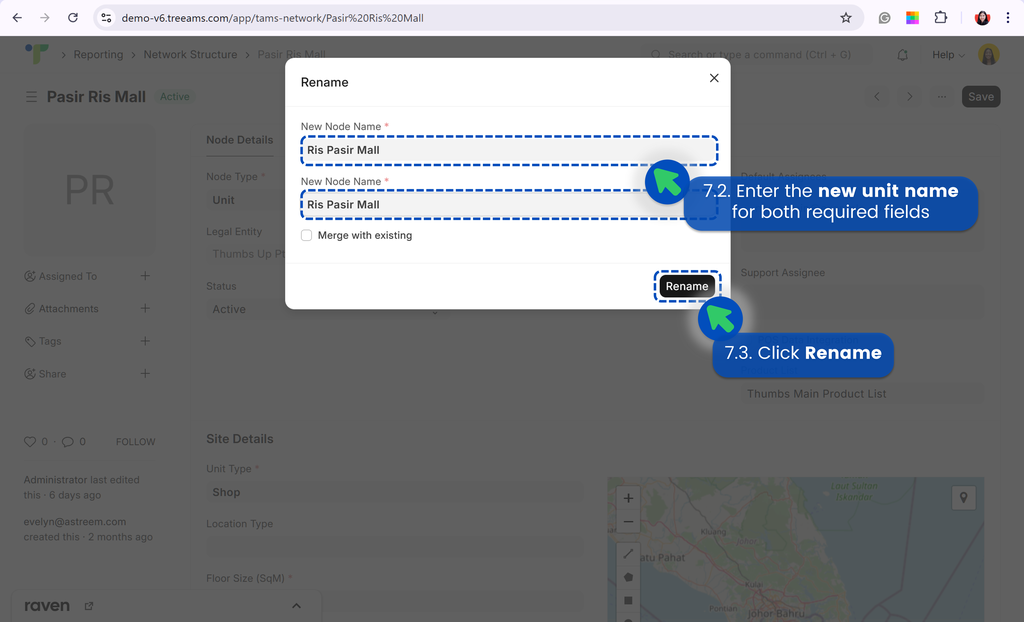
- If you need to change your Unit name, please follow below instructions:
- Click the Unit name
- Enter the new unit name for both required fields
- Click Rename
- Lastly, you can also change the status of the unit. You have three options, which are:
- Active
- Inactive
- Terminated