How to Use Product Level
This section covers:
- What is Product Level?
- How To Use Product Level
- Product Level: Stock Check
- Product Level: Product Sales
- Product Level: Stock Disposal
- Product Level: Stock Transfer
- Product Level: Product Receipt
- Product Level: Product Return
What is Product Level?
The Product Level in TreeAMS allows you to track and manage all important activities related to your products. It gives you visibility into product movement, stock levels, and sales performance across locations.
Key activities you can manage at the Product Level include:
- Stock Check: Record and monitor inventory levels.
- Product Sales: Track sales for individual products.
- Stock Disposal: Log products that are discarded or removed from inventory.
- Stock Transfer: Record movements of products between outlets or warehouses.
- Product Receipt: Capture incoming stock from suppliers.
This is activity is done on Product Order. - Product Return: Track products returned by customers or outlets.
By using Product Level features, businesses can maintain accurate inventory, optimize stock availability, and make better operational and financial decisions.
How To Use Product Level
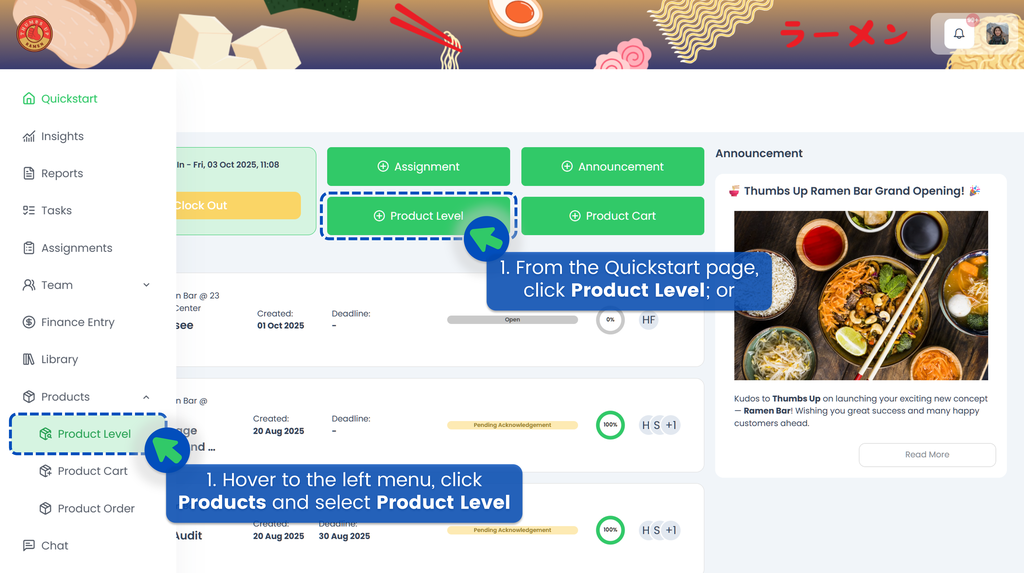
- From the Quickstart page, click Product Level or hover to the left menu, click Products and select Product Level.
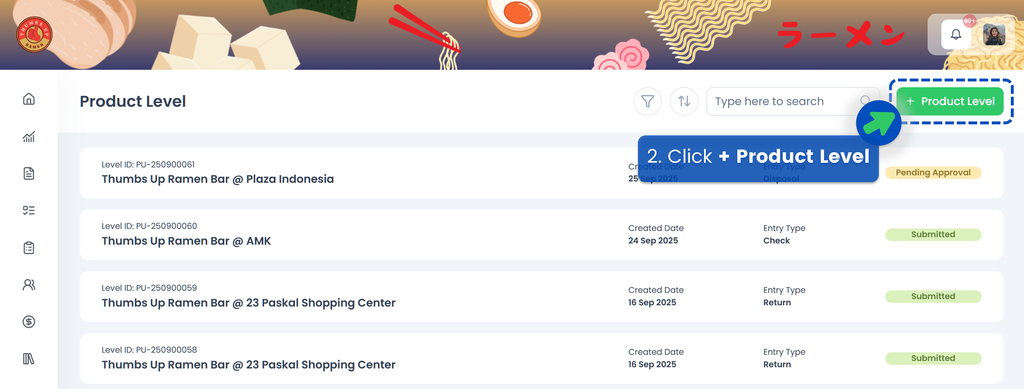
- Click + Product Level. If you used the Product Level shortcut from the Quickstart page, you may proceed directly to Step 3.
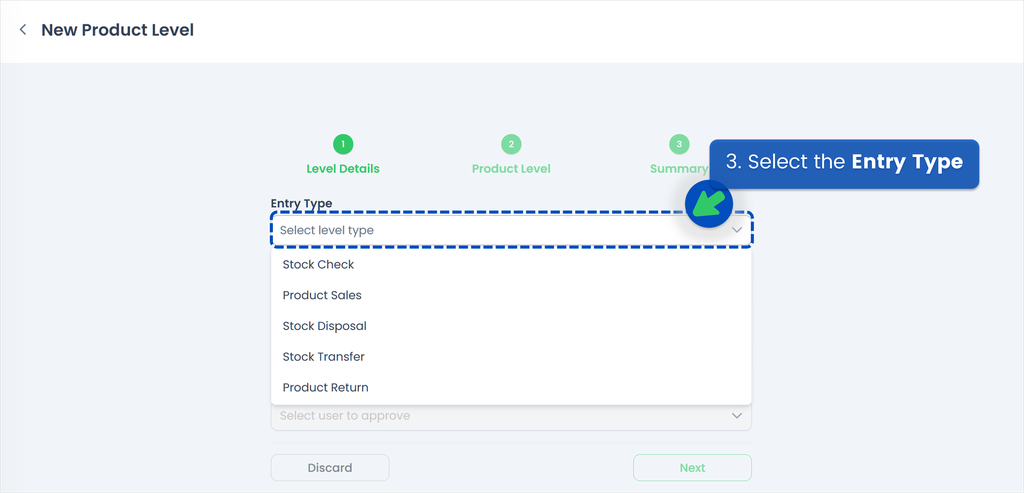
- Select your Entry Type.
- Please continue to the next section according to your selection.
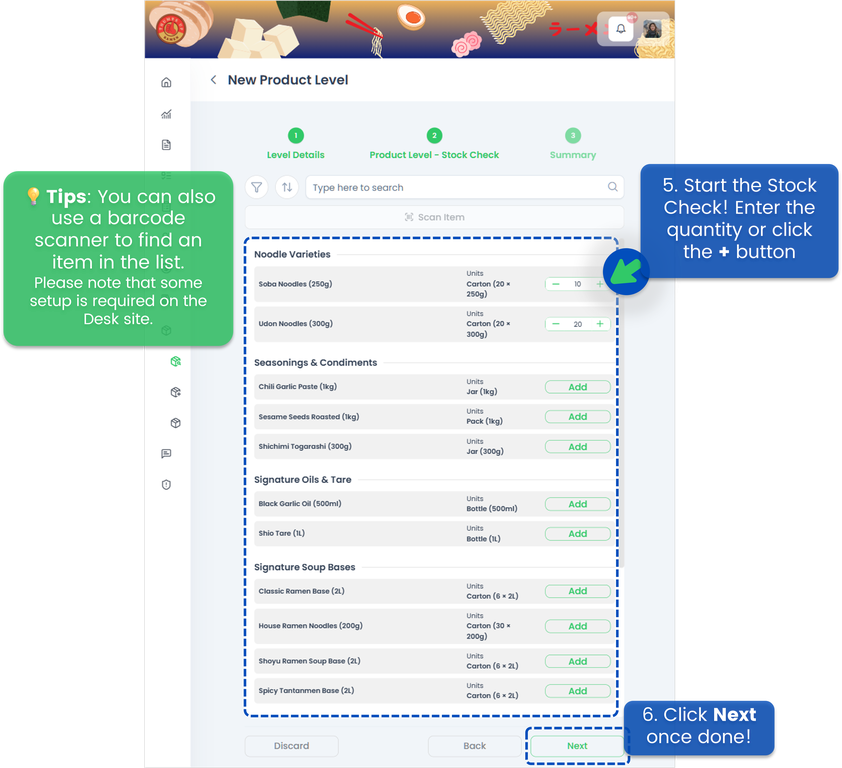
Product Level: Stock Check
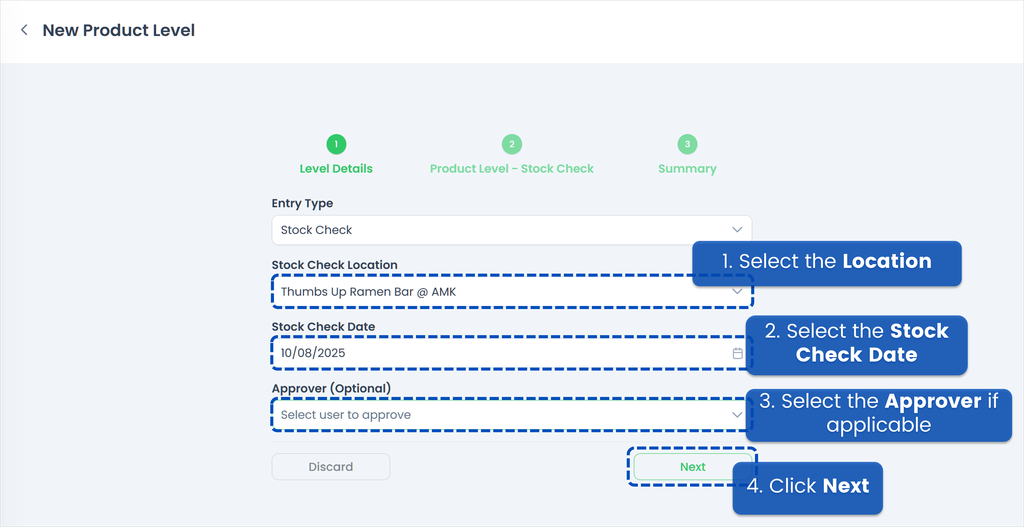
- Select the Location of the Stock Check
- Select the Stock Check Date
- This is optional, but you may select an Approver if applicable
💡 Make sure you have set up at least one team as the Default Assignment Team on the Desk site, and that at least one team member has a Manager or Approver role. Refer to Creating a Team for more information on Teams
- Click Next to proceed
- Start the Stock Check! Enter the quantity or click the + button
- Click Next once done!
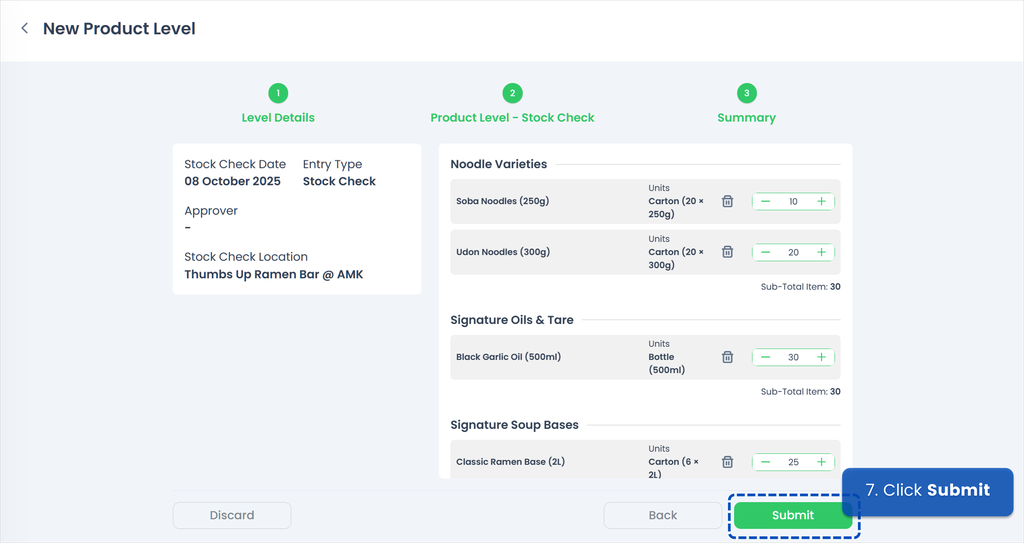
- Review your Stock Check entry and click Submit to proceed
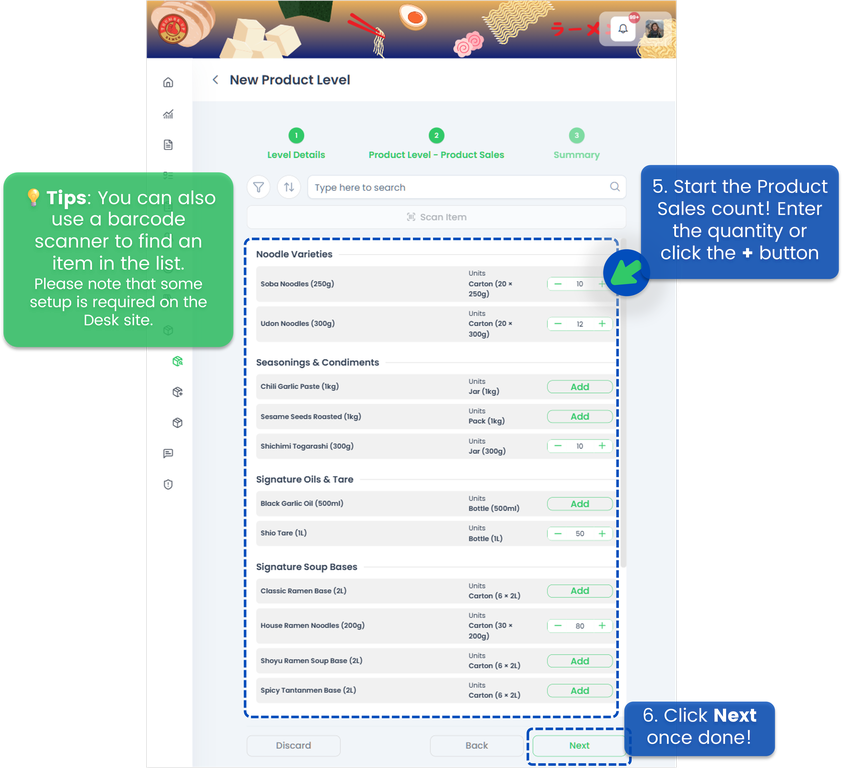
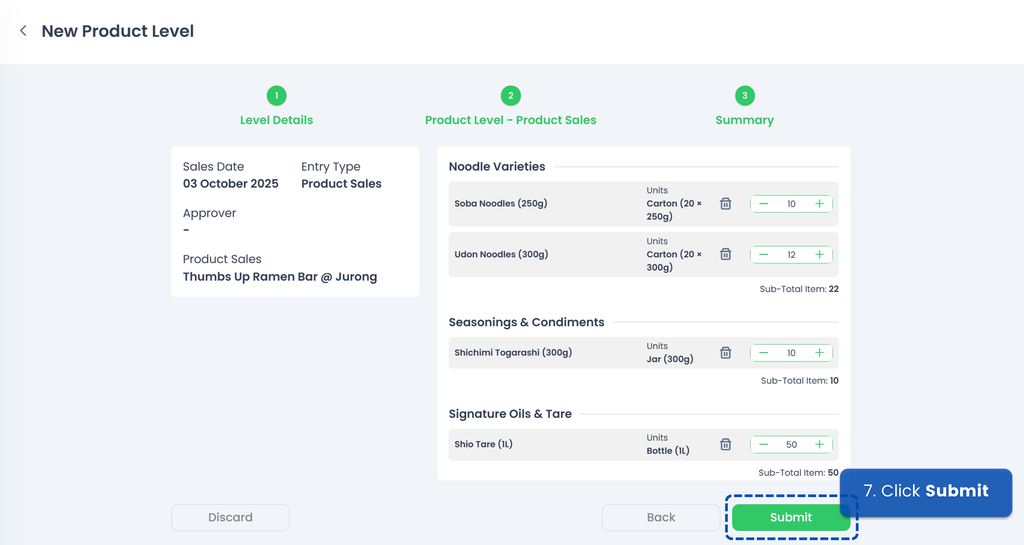
Product Level: Product Sales
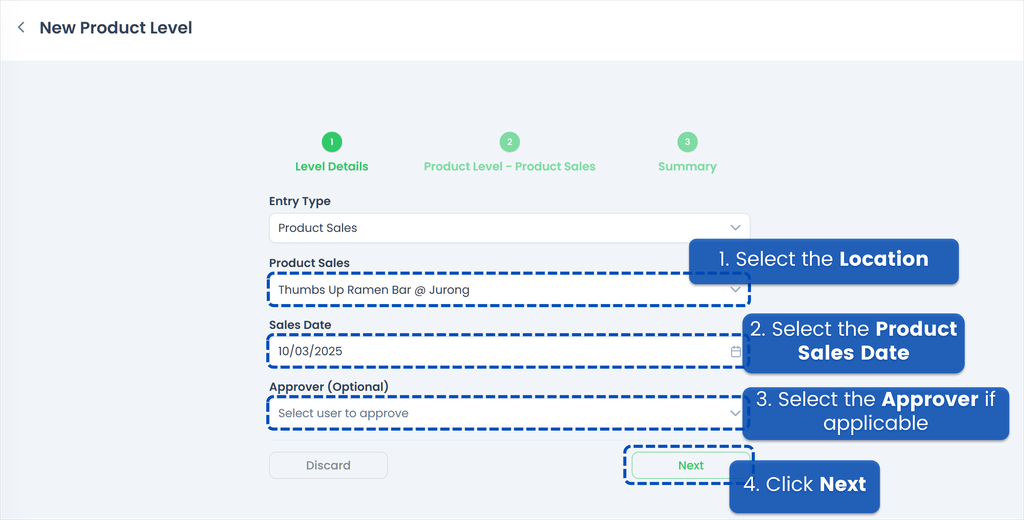
- Select the Location of the Product Sales
- Select the Product Sales Date
- This is optional, but you may select an Approver if applicable
💡 Make sure you have set up at least one team as the Default Assignment Team on the Desk site, and that at least one team member has a Manager or Approver role. Refer to Creating a Team for more information on Teams
- Click Next to proceed
- Start the Product Sales count! Enter the quantity or click the + button
- Click Next once done!
- Review your Product Sales entry and click Submit to proceed
Product Level: Stock Disposal
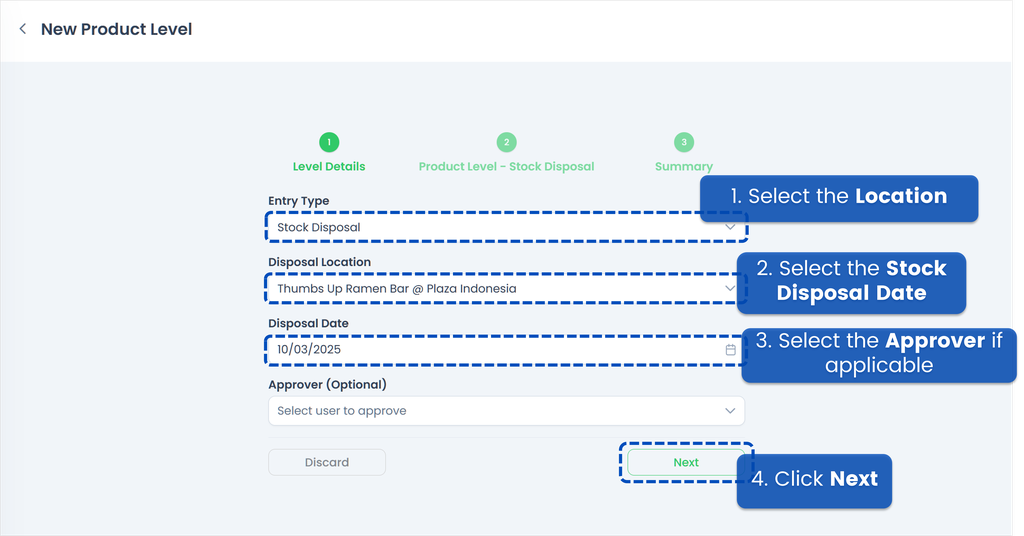
- Select the Location of the Stock Disposal
- Select the Stock Disposal Date
- This is optional, but you may select an Approver if applicable
💡 Make sure you have set up at least one team as the Default Assignment Team on the Desk site, and that at least one team member has a Manager or Approver role. Refer to Creating a Team for more information on Teams
- Click Next to proceed
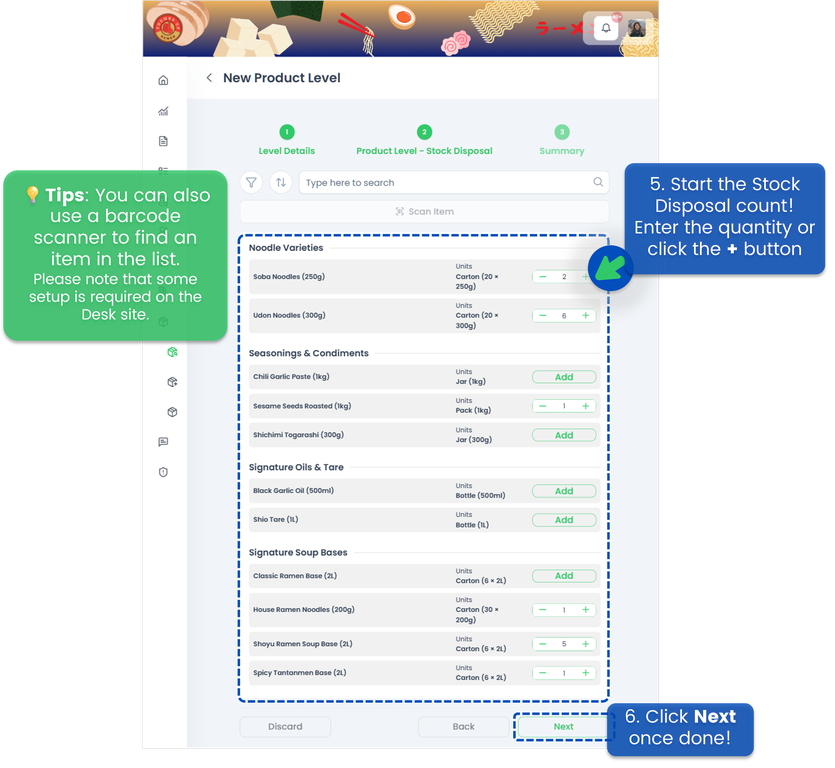
- Start the Stock Disposal count! Enter the quantity or click the + button
- Click Next once done!
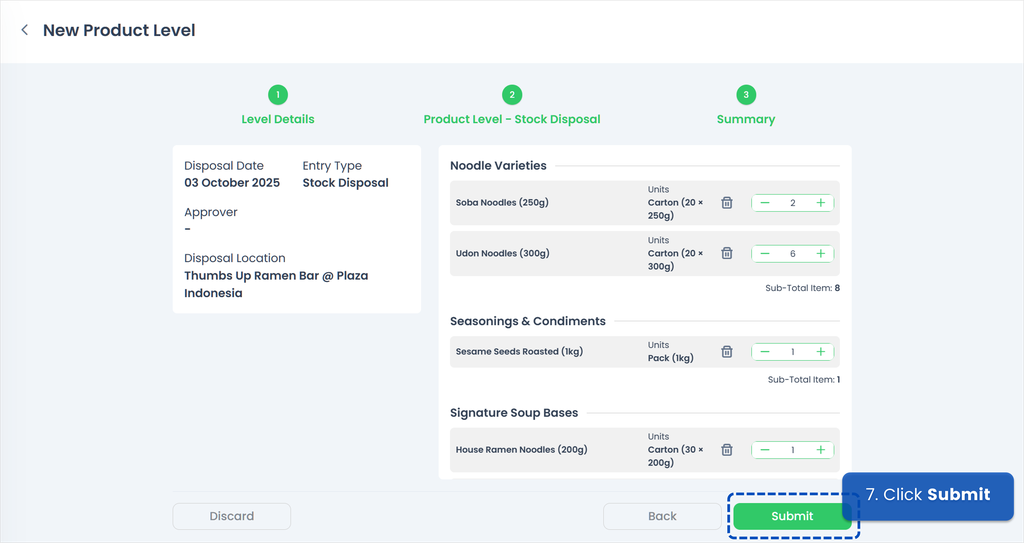
- Review your Stock Disposal entry and click Submit to proceed
Product Level: Stock Transfer
- Select the Source Location – the location from which the stock will be transferred.
- Select the Receiving Location – the location to which the stock will be transferred.
- Select the Stock Transfer Date.
- This is optional, but you may select an Approver if applicable
⚠️ Important:
Make sure you have set at least one team as the Default Assignment Team on the Organisation Section, and ensure the team has at least one member with a Team Manager or Approver role. Refer to Creating a Team for more information on Teams - Click Next to proceed
- Enter the quantity for each item to be transferred, or click the + button
- Click Next once done!
- Review your Stock Transfer entry and click Submit to proceed
Product Level: Product Receipt
To create a Product Receipt, you must have placed orders in TreeAMS beforehand. For detailed instructions, please refer to the Video Guide on How to Create a Receipt List in Product Order.
Product Level: Product Return
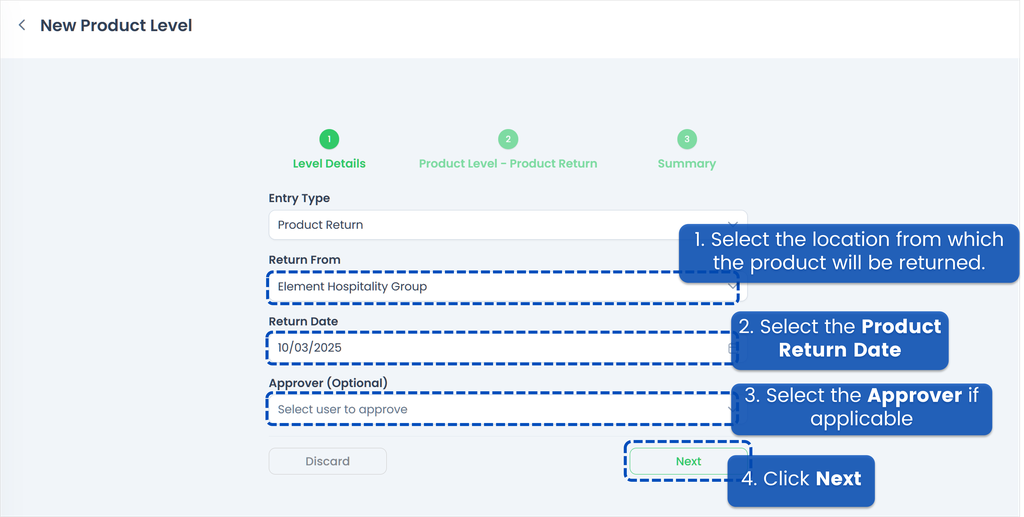
- Select the Location from which the product will be returned
- Select the Product Return Date
- This is optional, but you may select an Approver if applicable
💡 Make sure you have set up at least one team as the Default Assignment Team on the Desk site, and that at least one team member has a Manager or Approver role. Refer to Creating a Team for more information on Teams
- Click Next to proceed
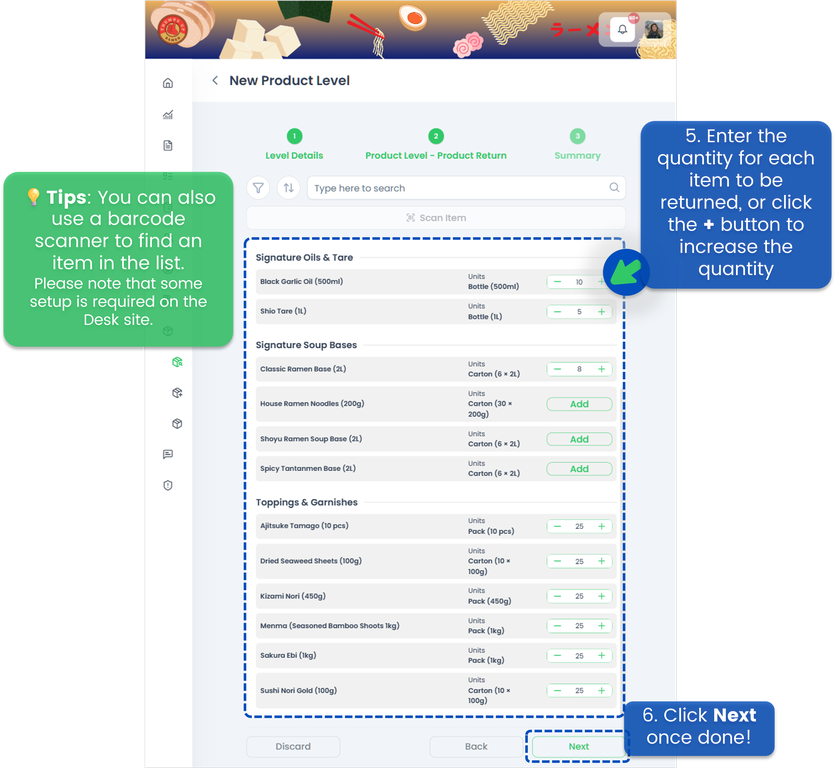
- Enter the quantity for each item to be returned, or click the + button
- Click Next once done!
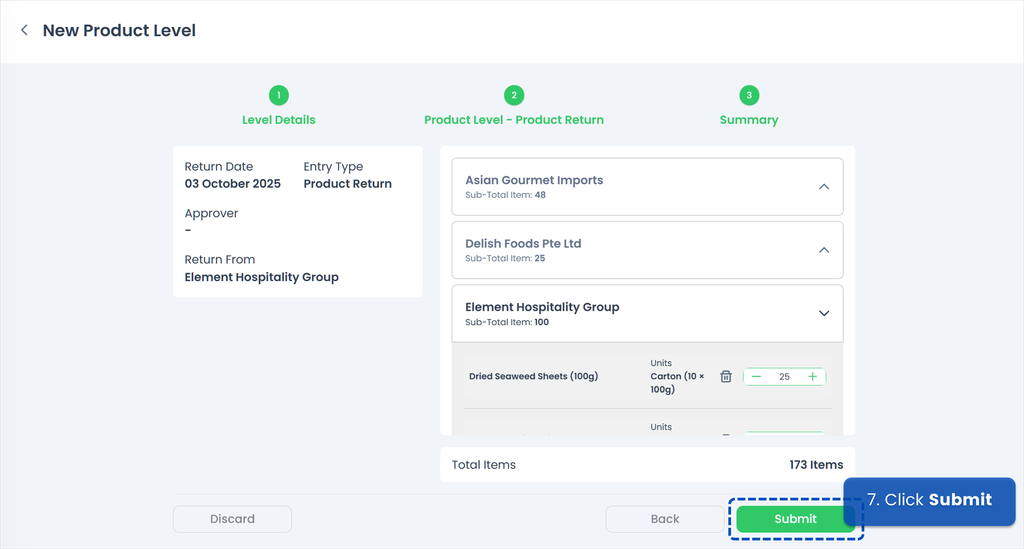
- On this summary page, TreeAMS automatically organizes all products that need to be returned by their suppliers. Now, please review your Product Return entry and click Submit to proceed
If you need assistance, please email us at
connect@treeams.com
.
We are happy to help! 👋😊